
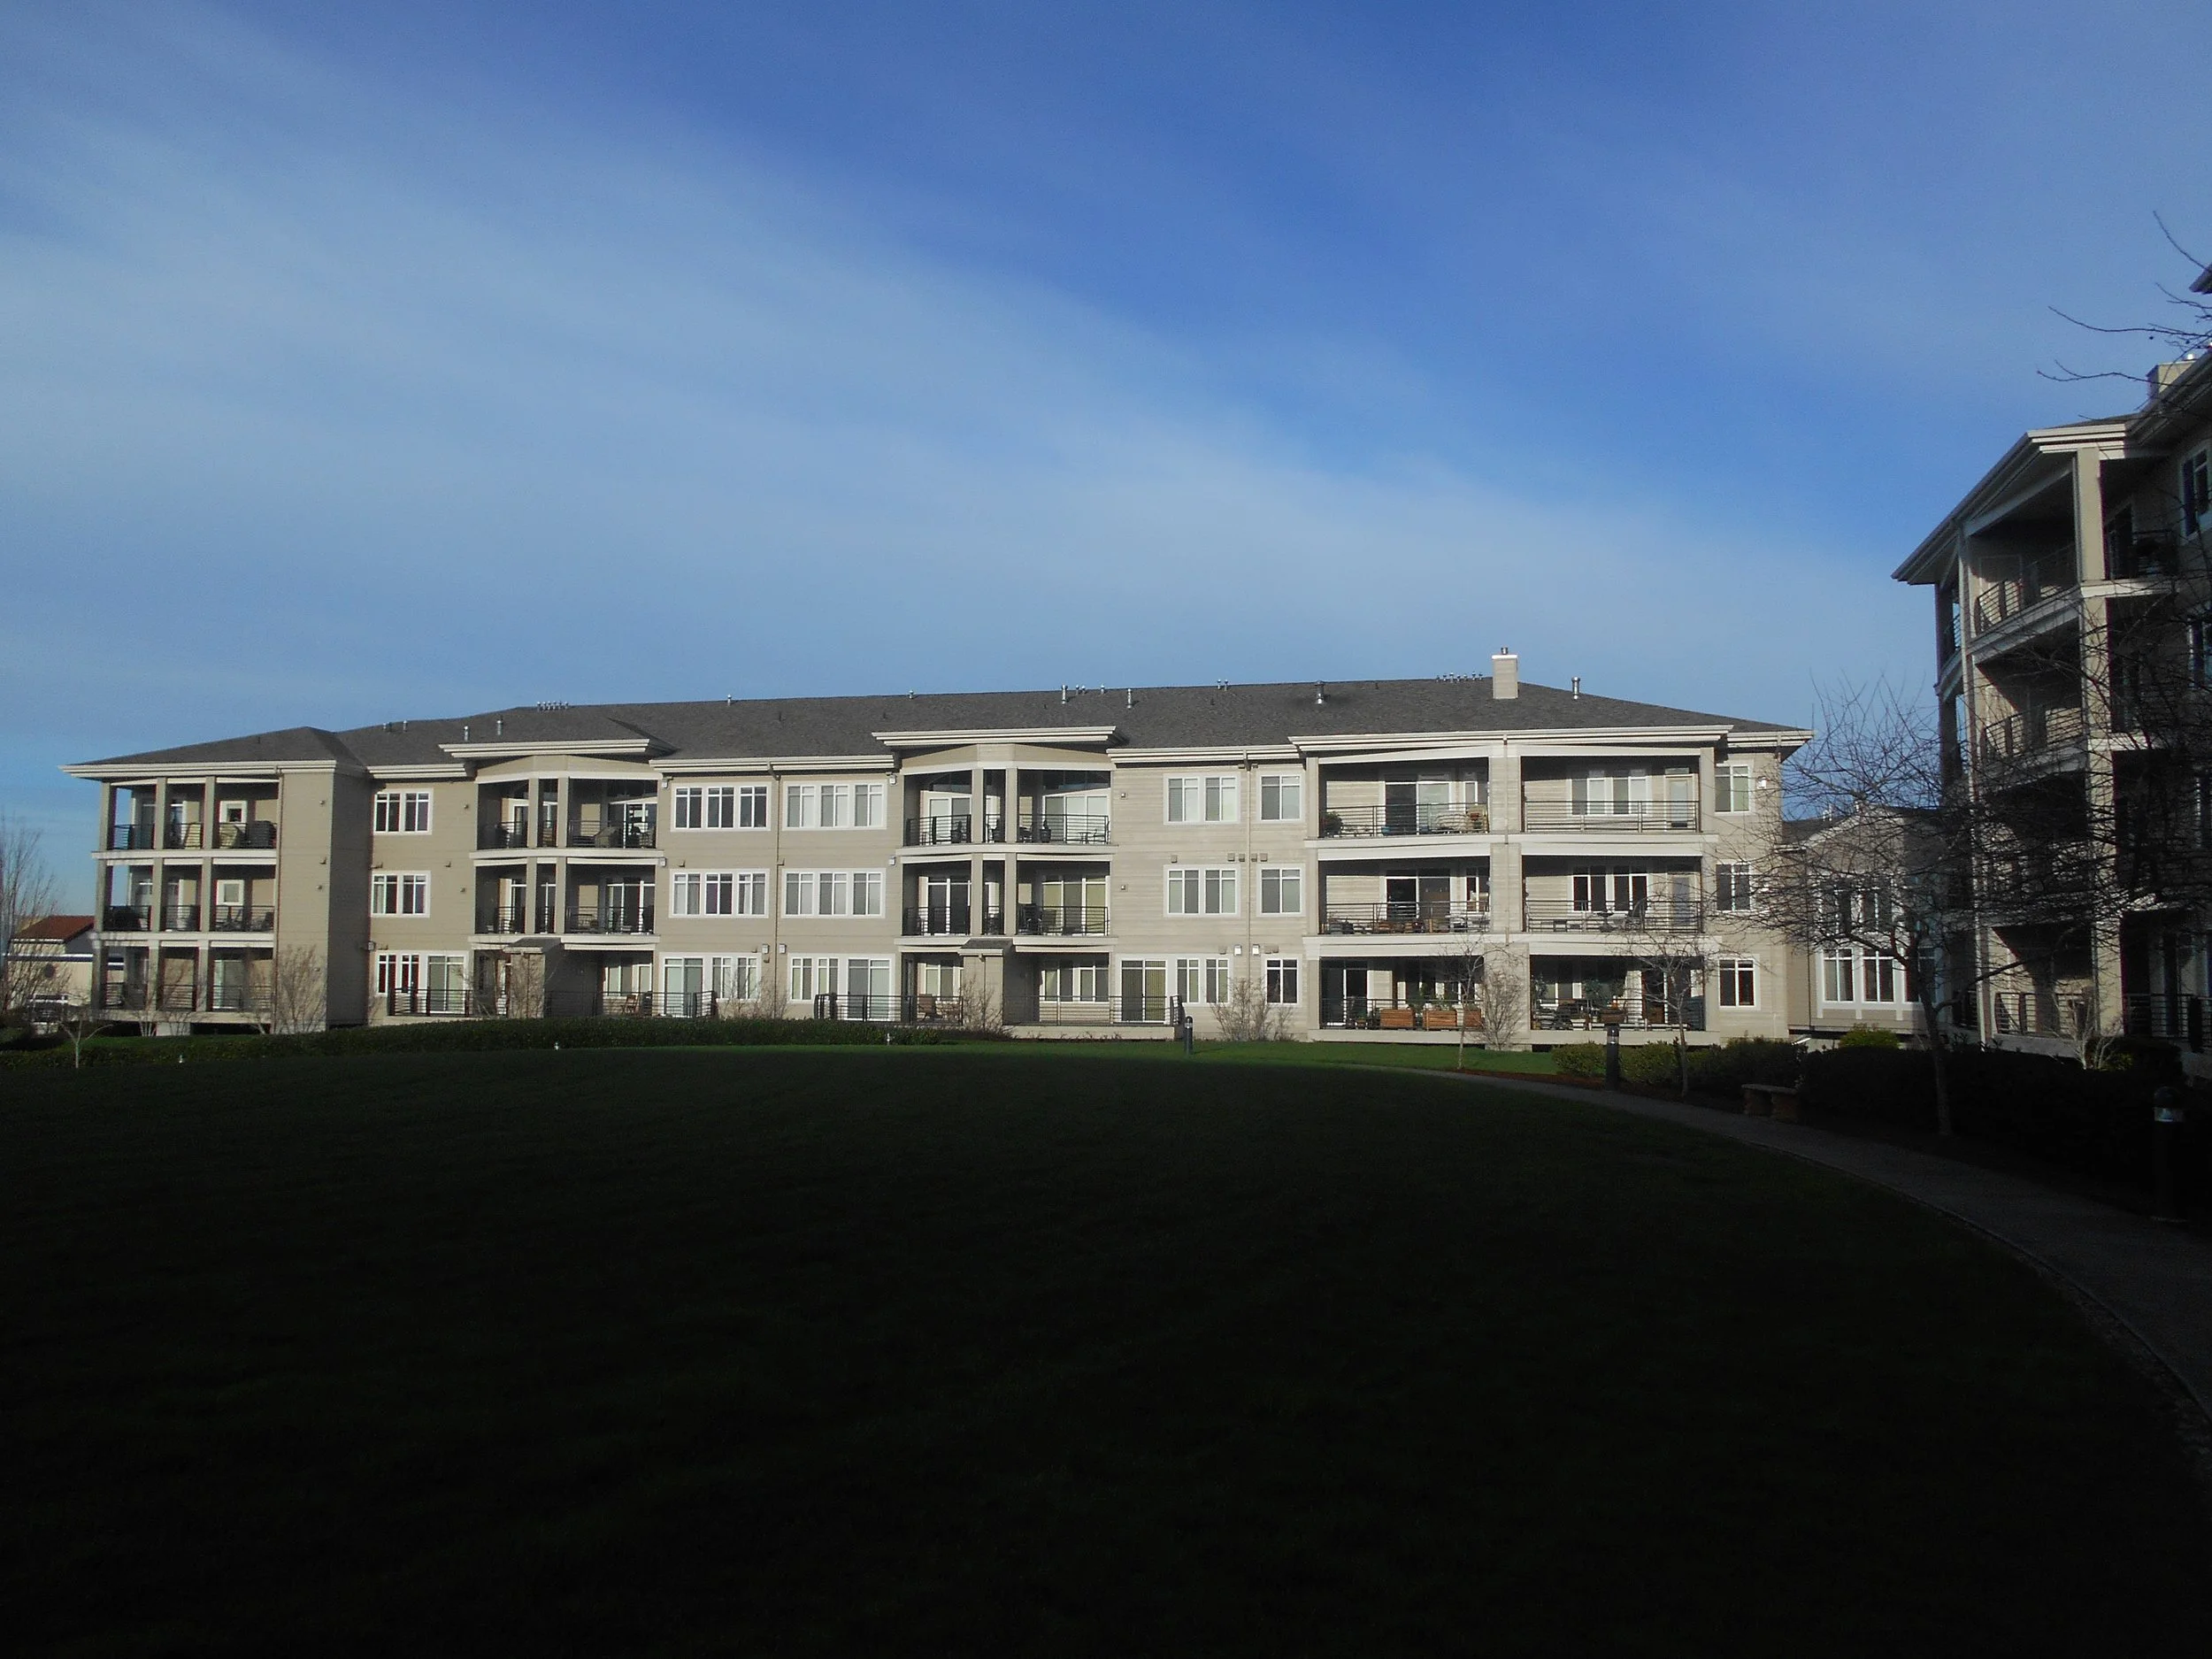
What Low VOC Paint Is and Why More Communities Are Choosing It?
Low VOC paint is paint formulated with fewer than 50 grams of volatile organic compounds (VOCs) per liter, which significantly reduces the harmful fumes released into the air during and after application. VOCs are chemicals that evaporate at room temperature and contribute to indoor air pollution, respiratory irritation, and smog formation. More condominium associations, HOA boards, and townhome communities are choosing low VOC paint because it protects resident health in shared living spaces, reduces disruptive odors during occupied-building painting projects, and aligns with tightening environmental regulations. This guide explains what VOCs are, how low VOC paint differs from zero VOC and traditional formulations, why the shift matters for multi-unit communities, and how to select the right product for your next project.
What Does Low VOC Mean in Paint?
Low VOC in paint means the formulation contains a reduced concentration of volatile organic compounds, typically fewer than 50 grams per liter for flat finishes and fewer than 100 grams per liter for non-flat finishes like satin and semi-gloss. These thresholds are set by the nonprofit Green Seal under its GS-11 standard, the most widely recognized certification benchmark for low-emission paint products.
Volatile organic compounds are carbon-based chemicals that transition from liquid to gas at room temperature. In paint, VOCs serve as solvents that help the pigment and binder spread smoothly across a surface. As the paint dries and cures, these solvents evaporate into the surrounding air in a process called off-gassing. Off-gassing from traditional paints releases chemicals including formaldehyde, toluene, xylene, and ethylbenzene, all of which the U.S. Environmental Protection Agency (EPA) identifies as indoor air pollutants with documented health effects.
Low VOC paints achieve their reduced emissions by using water as the primary solvent instead of petroleum-based chemicals. Water-based acrylic latex formulations dominate the low VOC category because water evaporates cleanly without releasing harmful compounds. The shift from oil-based to water-based chemistry is the foundational technology change that makes low VOC paint possible. Modern low VOC paints deliver the same color depth, adhesion, and durability that property managers and HOA boards expect from professional painting services, without the health trade-offs of older formulations.
What Is the Difference Between Low VOC and Zero VOC Paint?
The difference between low VOC and zero VOC paint is the concentration of volatile organic compounds in the formulation: low VOC paint contains fewer than 50 grams per liter, while zero VOC paint contains fewer than 5 grams per liter. The term "zero VOC" does not mean the paint contains absolutely no volatile organic compounds. It means the base formulation falls below the 5 g/L threshold established by the Federal Trade Commission (FTC) for products making a "zero emissions" claim.
An important distinction that most homeowners and property managers miss: the VOC content listed on the paint can measures only the base formula before tinting. The colorants added at the point of sale can increase the actual VOC level by 5 to 50 grams per liter depending on the color depth. Deep and vivid colors require more colorant, which means a "zero VOC" base tinted to a dark shade may no longer qualify as zero VOC once mixed. Green Seal certification addresses this by requiring that colorants used with certified paints cannot cause the final product to exceed the category VOC limit by more than 50 grams.
For condominium hallway repaints, clubhouse refreshes, and interior painting in occupied buildings, zero VOC paint offers the lowest possible exposure risk. For full exterior repaints where ventilation is naturally abundant, low VOC paint provides an excellent balance of performance, protection, and reduced environmental impact.
What Health Effects Do VOCs in Paint Cause?
VOCs in paint cause short-term health effects including headaches, dizziness, eye irritation, throat irritation, and nausea, while chronic exposure is associated with neurological disorders, respiratory disease, and organ damage. The U.S. EPA reports that concentrations of many VOCs are consistently up to ten times higher indoors than outdoors, making interior paint one of the most significant contributors to poor indoor air quality in residential and commercial buildings.
The health effects documented by the EPA and medical research include:
Headaches, dizziness, and fatigue from short-term exposure during and after painting
Eye, nose, and throat irritation from airborne VOC concentrations in enclosed spaces
Nausea and respiratory distress, particularly in individuals with asthma or chemical sensitivities
Decreased lung function from repeated exposure over days or weeks in poorly ventilated environments
Neurological effects including impaired mental focus and, with chronic long-term exposure, associations with dementia and tremors, according to Green Seal's review of published research
The EPA's Total Exposure Assessment Methodology (TEAM) Study found levels of approximately a dozen common organic pollutants to be 2 to 5 times higher inside homes than outside, regardless of whether the homes were in rural or highly industrial areas.
During and immediately after painting activities, indoor VOC levels can spike to 1,000 times background outdoor levels, according to EPA data. These elevated concentrations persist for hours to days depending on ventilation, and lower-level off-gassing continues for weeks to months as the paint film fully cures.
The health stakes are particularly high for vulnerable populations. A peer-reviewed study published in the National Institutes of Health (NIH) database found that asthmatic children exposed to paint VOCs were 10 times more likely to experience an asthma attack than unexposed asthmatic children when adjusted for other risk factors. Pediatric asthma affects 6.2 million children in the United States and accounts for approximately $50 billion per year in healthcare costs, according to the same NIH research. Low VOC and zero VOC paints reduce the chemical exposure that triggers these health events.
How Do VOCs in Paint Affect Indoor Air Quality?
VOCs in paint affect indoor air quality by off-gassing chemical vapors that accumulate inside enclosed spaces, creating pollutant concentrations significantly higher than outdoor air. The EPA confirms that indoor VOC concentrations are consistently higher than outdoor levels because buildings trap the emitted chemicals, especially in spaces with limited ventilation. Research published in Environmental Sciences journals estimates that people in developed countries spend approximately 80% of their time indoors, which means cumulative exposure to indoor VOCs far exceeds outdoor exposure for most people.
Paint is a particularly significant source of indoor VOCs because of the large surface areas it covers. A standard 12-by-12-foot room has approximately 432 square feet of painted wall and ceiling surface, which is three times the exposed area of flooring in the same space, according to data from the American Institute for Conservation. VOC emissions from that painted surface can continue for 6 months or more after application as the paint film completes its full curing process. Low VOC paint shortens the off-gassing window and reduces the peak concentration of airborne chemicals during the critical first hours and days after application.
Can You Sleep in a Room After Painting With Low VOC Paint?
Yes, you can sleep in a room after painting with low VOC paint, though allowing 2 to 4 hours of ventilation before sleeping in the space is recommended for maximum comfort and safety. Low VOC formulations release far fewer airborne chemicals than traditional paints, which means the characteristic strong paint odor is significantly reduced or nearly absent. Most low VOC interior paints reach a dry-to-touch state within 1 to 2 hours and produce minimal odor by the time the surface is dry.
Zero VOC paint offers an even safer option for bedrooms and occupied spaces. With fewer than 5 grams of VOCs per liter in the base formula, zero VOC products are the preferred choice for painting nurseries, bedrooms, and any space where residents will sleep shortly after application. Keeping windows open or running a fan during and after painting further accelerates the dissipation of any residual fumes.
Is Low VOC Paint Safe for Babies and Children?
Low VOC paint is significantly safer for babies and children than traditional paint because it releases fewer harmful chemicals into the air, but zero VOC paint is the recommended choice for nurseries and children's rooms. Children breathe faster than adults, have smaller lungs, and are closer to the ground where heavier VOC molecules settle, which makes them more vulnerable to airborne chemical exposure. The NIH pediatric asthma study cited above demonstrates the direct connection between paint VOC exposure and respiratory episodes in children.
For multi-unit communities painting shared hallways, stairwells, and common areas near family residences, low VOC paint protects children who live in adjacent units and pass through freshly painted spaces daily. Our completed projects on condominium and townhome communities prioritize resident safety, and selecting the appropriate paint chemistry is a core part of that commitment.
Is Low VOC Paint Better for the Environment?
Yes, low VOC paint is better for the environment because it releases fewer volatile organic compounds that contribute to ground-level ozone formation, smog, and greenhouse gas accumulation. When VOCs escape into the atmosphere, they react with nitrogen oxides in the presence of sunlight to produce ozone at ground level. Ground-level ozone is a key component of smog and a greenhouse gas that traps heat in the lower atmosphere, contributing to temperature increases and respiratory health problems in urban areas.
The environmental case for low VOC paint is strong enough that California, the state with the most aggressive air quality regulations in the nation, requires all paints and coatings sold within its borders to meet specific VOC content limits enforced by the California Air Resources Board (CARB). These regulations exist because VOC emissions from consumer products, including paint, represent a measurable share of the state's total air pollution. Other states, including Oregon, follow EPA guidelines that align with the Clean Air Act's framework for reducing VOC emissions from industrial and consumer sources.
The global low VOC paint market reflects this environmental momentum. Strategic Market Research projects the market will grow from $11.6 billion in 2024 to $16.4 billion by 2030 at a compound annual growth rate of 5.8%. Research from Reanin market analysis indicates that approximately 55% of new building projects are switching to low VOC paints to meet health and safety goals. The green building sector itself is projected to grow by 25% over the next five years, according to Market Research Future, and low VOC paints are often a prerequisite for certifications like LEED (Leadership in Energy and Environmental Design).
Why Are More Communities Switching to Low VOC Paint?
More communities are switching to low VOC paint because multi-unit residential buildings present unique health, comfort, and regulatory challenges that traditional high-VOC paints cannot address without significant disruption to occupied spaces. Condominium associations, townhome HOAs, and property management companies are recognizing that painting an occupied building is fundamentally different from painting a vacant single-family home.
In a condominium or townhome community, painting happens while residents live, work, and sleep in the building. Interior hallway repaints, stairwell refreshes, clubhouse updates, and even exterior painting near open windows and balconies expose residents to whatever chemicals the paint releases. Traditional high-VOC paints produce strong odors that linger in shared corridors and ventilation systems for days, generating complaints, health concerns, and dissatisfaction among residents who had no choice about the painting schedule.
Low VOC paint solves these problems at the chemistry level. Reduced odor means residents are not overwhelmed by fumes when they walk through a freshly painted hallway. Faster off-gassing clearance means the air returns to normal quality sooner. Lower chemical emissions mean property managers fulfill their responsibility to protect resident health during necessary maintenance work. Many HOA boards now include low VOC or zero VOC paint specifications in their community maintenance standards specifically to address these concerns.
Green building certifications add another layer of motivation. LEED certification requires the use of low-emitting materials, including paints and coatings, as a credit toward certification. Communities pursuing LEED, ENERGY STAR, or similar sustainability designations must demonstrate that their maintenance materials meet VOC thresholds. Even communities not pursuing formal certification benefit from adopting low VOC standards, because the same principles, healthier air, less odor, reduced environmental footprint, improve quality of life for every resident. Here in the Portland metro area, where environmental consciousness runs high, we see more condominium and townhome associations specifying low VOC products in their painting contracts every year.
Does Low VOC Paint Perform as Well as Regular Paint?
Yes, modern low VOC paint performs as well as regular paint in coverage, durability, adhesion, and color retention, thanks to significant advances in water-based acrylic resin technology over the past two decades. The early low VOC formulations from the 1990s earned a reputation for thinner coverage and weaker durability compared to their high-VOC counterparts. That reputation no longer reflects the current state of paint chemistry.
Today's premium low VOC paints use 100% acrylic latex resins that deliver excellent hide (the ability to cover the underlying color in fewer coats), strong adhesion to properly prepared surfaces, and long-term resistance to fading, chalking, and cracking. Major paint manufacturers including Sherwin-Williams, Benjamin Moore, and PPG have invested heavily in reformulating their professional-grade product lines to meet low VOC standards without sacrificing the performance characteristics that painters and property managers rely on.
AkzoNobel, one of the world's largest coatings manufacturers, introduced a new-generation eco-premium interior paint line in January 2024 with over 40% bio-based content and near-zero VOC levels, according to Global Market Insights. This product represents the direction the entire industry is moving: performance and sustainability are no longer trade-offs. They are parallel engineering goals.
What Is the Problem With Low VOC Paint?
The main problem with low VOC paint is a slightly higher purchase price compared to traditional formulations, and a historically limited color range that modern manufacturing has largely eliminated. Low VOC interior paints typically cost $5 to $15 more per gallon than comparable traditional products. On a full condominium hallway repaint requiring 20 to 40 gallons, this translates to $100 to $600 in additional material cost, a modest premium relative to the total project budget.
The other historical concern, that low VOC products offered fewer color options and finishes, is no longer accurate. Most major manufacturers now produce their full color palette in low VOC formulations across flat, eggshell, satin, semi-gloss, and gloss finishes. Our satisfied clients consistently report that the color depth and finish quality of low VOC products match their expectations for a professional result.
Does Low VOC Paint Cost More Than Regular Paint?
Low VOC paint costs approximately $5 to $15 more per gallon than regular paint at comparable quality levels. A gallon of premium traditional exterior paint runs $50 to $80, while the low VOC equivalent from the same manufacturer runs $55 to $95. The premium reflects the cost of water-based acrylic resin technology and the additional quality control required to verify VOC content against certification thresholds.
For a full exterior repaint on a multi-building condominium community requiring 80 to 150 gallons, the low VOC premium adds $400 to $2,250 to the material budget. Against a total project cost of $20,000 to $60,000 or more for a community-scale repaint, this represents a 2% to 4% increase. The reduction in resident complaints, the health protection for occupants, and the alignment with modern building standards make this one of the most cost-effective upgrades a community can specify.
Can Low VOC Paint Be Used for Exterior Projects?
Yes, low VOC paint can be used for exterior projects, and most major paint manufacturers now offer low VOC formulations specifically engineered for exterior durability, weather resistance, and UV protection. Exterior low VOC paints use the same 100% acrylic latex resin technology as their interior counterparts, with additional additives for mildew resistance, moisture barrier performance, and color retention under direct sunlight.
Exterior applications carry a lower health risk from off-gassing than interior applications because outdoor ventilation naturally disperses airborne chemicals. The primary benefit of low VOC exterior paint for communities is environmental: reduced VOC emissions mean less contribution to ground-level ozone and smog. For condominium and townhome communities where exterior painting happens near open windows, balconies, and patios, low VOC exterior paint also reduces the odor that drifts into occupied units during the project.
We see this benefit firsthand on our community painting projects across Oregon. Residents who live above or adjacent to the painting zone notice far less odor intrusion when our crews use low VOC exterior products compared to traditional formulations. Selecting the right exterior paint chemistry is part of the planning process we walk through with every property manager and board before work begins.
What Certifications Should You Look for on Low VOC Paint?
The certifications you should look for on low VOC paint are Green Seal GS-11, GREENGUARD, GREENGUARD Gold, and compliance with California Section 01350 emission standards. Each certification verifies a different aspect of the paint's environmental and health profile, and understanding what each one measures helps you make an informed product selection.
Certification
What It Measures
VOC Threshold
Key Benefit
Green Seal GS-11
VOC content in formula + colorant restrictions
Flat: <50 g/L; Non-flat: <100 g/L
Covers both base and tinted product
GREENGUARD
Chemical emissions during and after application
Tested at 7 days post-application
Verifies actual off-gassing performance
GREENGUARD Gold
Stricter emission limits for sensitive environments
Meets California Section 01350 standards
Safe for schools, healthcare, childcare facilities
California Section 01350
Indoor air quality emission testing protocol
Product-specific emission thresholds
Required for California state-funded buildings
Sources: Green Seal (2025), UL (Underwriters Laboratories) GREENGUARD program, California Department of Public Health
Green Seal GS-11 is the most widely recognized paint certification because it measures both the formulation's VOC content and the VOC contribution of colorants added at the point of sale. This matters because a paint labeled "low VOC" on the shelf can exceed the threshold once tinted to your selected color. Green Seal certification accounts for that variable.
GREENGUARD and GREENGUARD Gold certifications, administered by UL (Underwriters Laboratories), go a step further by measuring actual emissions from the applied paint over time, not just the VOC content in the can. GREENGUARD Gold is the most stringent consumer product certification available and is required for products used in schools, healthcare facilities, and childcare centers. For condominium communities with families and seniors in residence, requesting GREENGUARD Gold-certified products provides the highest level of assurance.
How Do You Choose the Right Low VOC Paint?
Choosing the right low VOC paint requires checking the VOC content on the label, verifying third-party certifications, matching the formulation to the surface type, and selecting the appropriate finish for the application. The following steps walk through the selection process from start to finish.
Read the VOC content on the technical data sheet (TDS). Every paint product publishes a TDS that lists the exact VOC content in grams per liter. Compare this number to the Green Seal thresholds: fewer than 50 g/L for flat finishes and fewer than 100 g/L for non-flat finishes. Lower numbers mean fewer emissions.
Verify third-party certifications. Look for Green Seal GS-11, GREENGUARD, or GREENGUARD Gold logos on the can or in the product documentation. These certifications mean the product has been independently tested and verified, not just self-reported by the manufacturer.
Match the paint to the surface. Interior walls and ceilings require interior-grade low VOC latex. Exterior siding, trim, and fascia require exterior-grade low VOC acrylic with UV stabilizers and mildew-resistant additives. Using interior paint on exterior surfaces, or vice versa, compromises durability regardless of VOC content.
Select the finish based on the surface use. Flat and matte finishes work well for ceilings and low-traffic walls. Eggshell and satin finishes handle moderate traffic in hallways and living areas. Semi-gloss and gloss finishes resist moisture and scrubbing on trim, doors, and bathrooms.
Ask about colorant VOC content. Request confirmation that the colorant system your paint retailer uses is also low VOC or zero VOC. Some retailers use high-VOC colorants that add 20 to 50 grams per liter to the tinted product, undermining the low VOC base formula.
Is Low VOC Paint Required by Law?
Low VOC paint is not universally required by federal law, but multiple states enforce VOC content limits on paints and coatings, and the regulatory trend is moving toward stricter requirements nationwide. California leads the nation with its Air Resources Board (CARB) regulations, which set specific maximum VOC content levels for every category of architectural coating sold in the state. Several other states, including those in the Ozone Transport Commission (OTC) region covering the northeastern United States, have adopted similar rules.
At the federal level, the U.S. EPA regulates VOC emissions under the Clean Air Act but does not currently set mandatory VOC limits for consumer paint products. However, green building codes and procurement standards are increasingly filling this gap. LEED certification requires low-emitting materials, and many state-funded building projects, including schools and government facilities, mandate the use of paints meeting California Section 01350 or equivalent standards.
For condominium and townhome communities, the practical effect is that low VOC paint is becoming the standard specification even where it is not legally mandated. HOA boards, property management companies, and professional painting contractors are adopting low VOC standards proactively because the health, environmental, and resident satisfaction benefits outweigh the modest cost premium.
Frequently Asked Questions
How Long Does Low VOC Paint Take to Off-Gas?
Low VOC paint takes significantly less time to off-gas than traditional paint, with most volatile compounds dissipating within the first 3 to 5 days after application. Traditional high-VOC paints can continue off-gassing at measurable levels for 6 months or more. Low VOC formulations reach negligible emission levels much sooner because they contain fewer volatile solvents to begin with. Maintaining ventilation during the first 48 to 72 hours accelerates the process further.
Does Low VOC Paint Have Less Odor Than Regular Paint?
Yes, low VOC paint has noticeably less odor than regular paint because the volatile solvents responsible for the strong "new paint" smell are reduced or replaced with water-based alternatives. Many low VOC products are described as "low odor" specifically because the water-based acrylic formulation produces minimal smell during application and drying. Zero VOC products are nearly odorless.
Can You Use Low VOC Paint Over Existing Paint?
Yes, you can use low VOC paint over existing paint as long as the existing surface is clean, dry, and properly prepared. Low VOC paints adhere to previously painted surfaces the same way traditional paints do. The key is surface preparation: washing, sanding, and priming any bare or damaged areas before applying the new coat. The VOC content of the new paint does not affect its ability to bond to a cured paint surface.
Is Low VOC Paint Available in All Colors and Finishes?
Yes, low VOC paint is now available in virtually all colors and finishes from every major manufacturer. The early generations of low VOC paint had limited color palettes, but modern formulations offer the same full spectrum of tints in flat, eggshell, satin, semi-gloss, and gloss finishes. The only consideration is that deep or vivid tint colors may add VOC content through the colorant, so specifying a low VOC colorant system preserves the product's emission profile.
Do Professional Painters Prefer Low VOC Paint?
Yes, most professional painters prefer low VOC paint for occupied-building projects because it reduces crew exposure to harmful fumes, eliminates the need for respirator equipment in many applications, and generates fewer resident complaints. The reduced odor allows painters to work in enclosed hallways, stairwells, and interior spaces without the health risks associated with high-VOC solvent exposure over a full workday. Professional crews working on large-scale community projects, like ours, appreciate the improved working conditions alongside the resident health benefits.
Should HOAs Require Low VOC Paint for Community Projects?
Yes, HOAs should consider requiring low VOC paint specifications in their community maintenance contracts because it protects resident health, reduces complaints during painting projects, and demonstrates responsible stewardship of the community's living environment. A simple specification clause in the painting contract, such as "all paints shall meet Green Seal GS-11 or equivalent VOC limits," adds the requirement without limiting contractor flexibility on brand selection.
The Takeaway
Low VOC paint is not a niche product or a passing trend. It is the direction the entire paint industry is moving, driven by health research, environmental regulation, green building standards, and the practical reality that most painting happens in spaces where people live and breathe. For condominium and townhome communities, specifying low VOC paint means less odor disruption during painting projects, cleaner air for residents of all ages, and alignment with the sustainability standards that define responsible property management today.
At Verhaalen Painting, we have been using quality, eco-friendly paint products on condominium and townhome projects for over 30 years. We would be happy to walk you through the product options for your next community painting project. Call us at (503) 657-5570 or reach out through our contact page to start the conversation.

Residential Exterior House Painting and How the Pros Handle It?
Professional exterior house painting takes 3 to 7 days for a typical home and follows a structured process that includes power washing, scraping, sanding, caulking, priming, two full coats of paint, and a final walkthrough inspection. The process is far more involved than most property owners realize. Surface preparation alone accounts for up to 60% of total labor time on a quality exterior paint job, according to industry data from RW Professional Painting. What separates a professional result from a weekend DIY attempt is not the act of applying paint; it is the preparation, product selection, technique, and quality control that happen before, during, and after the color goes on. This guide walks through exactly what the professional exterior painting process looks like from start to finish, what to expect at each stage, how to avoid common mistakes, and why the investment protects your property for years.
What Are the Advantages of Painting the Exterior of a House?
The advantages of painting the exterior of a house include weather protection for the building envelope, increased property value, improved curb appeal, prevention of wood rot and moisture damage, and extended lifespan of exterior materials. Paint is not a cosmetic upgrade alone. The dried paint film creates a physical barrier between your siding, trim, and structural wood and the rain, UV radiation, temperature swings, and biological growth that degrade those materials over time.
The National Association of Realtors' 2025 Remodeling Impact Report found that 50% of surveyed Realtors recommend painting the entire home as the number one project before listing. Painting exterior siding received a homeowner Joy Score of 8.8 out of 10, reflecting high satisfaction among homeowners who completed the project. These numbers confirm what property managers already know: a well-maintained exterior finish signals care, quality, and value to anyone who sees the building.
For condominium and townhome communities, the advantages multiply. A fresh exterior unifies the appearance of every building in the community, reinforces property values across all units, and demonstrates to current and prospective residents that the board takes maintenance seriously. We approach every exterior painting project with these outcomes in mind.
What Should You Know Before Painting Your House?
Before painting your house, you should know the condition of your current paint and siding, the type of surface material, the best time of year for your climate, how to select the right paint product, and whether professional work or DIY is the better choice for your situation. Skipping any of these considerations leads to wasted money, premature paint failure, or a result that does not match expectations.
Start by inspecting the existing exterior. Look for peeling, cracking, blistering, chalking, or bare spots. These signs indicate that the current paint film has failed and the underlying material is exposed to the elements. CertaPro's professional guidelines note that going more than 10 years without an exterior update, even without visible failure, is reason enough to schedule a repaint because the paint's protective properties diminish gradually before visible signs appear.
Identify the siding material. Wood, vinyl, fiber cement, stucco, brick, and aluminum each require different primers, paints, and preparation methods. Applying the wrong product to the wrong substrate causes adhesion failure regardless of how well the surface is prepared. A professional painter identifies the substrate during the initial estimate walkthrough and matches every product to the specific material on your building.
What Does a Professional Exterior Painting Process Look Like?
A professional exterior painting process follows a structured sequence of estimation, preparation, priming, painting, detail work, and final inspection, with each phase building on the one before it. The process is designed to deliver a finish that lasts 7 to 10 years or more, which is the standard lifespan range cited by both Sherwin-Williams and CertaPro for a quality exterior paint job. Understanding what happens at each stage helps property managers and homeowners evaluate bids, set realistic timelines, and hold contractors accountable for the standards that produce lasting results.
Estimation and planning. A professional crew begins with a detailed walkthrough of the building exterior, noting the siding material, current paint condition, areas needing repair, square footage, number of stories, and any access challenges. The estimator identifies the right primer and paint system for the substrate, calculates material quantities (one gallon covers 250 to 400 square feet per coat, according to Sherwin-Williams), and provides a written scope of work with timeline and cost. You can request a free estimate to see what this process looks like for your specific property.
Site protection. Before any preparation begins, the crew covers landscaping, walkways, outdoor furniture, light fixtures, and vehicles with drop cloths and plastic sheeting. Windows and doors are masked with painter's tape and protective film. On multi-unit buildings, the crew coordinates with residents to close windows and move personal items away from work zones.
Power washing. The entire exterior is pressure washed to remove dirt, mildew, mold, chalking paint residue, and pollen. The surface must dry for 24 to 48 hours before any further work begins. Power washing creates the clean foundation that every subsequent coat depends on for adhesion.
Scraping, sanding, and repair. Peeling and cracking paint is scraped to a sound edge. Rough spots are sanded smooth. Cracks, nail holes, and minor rot are filled with exterior-grade wood filler or epoxy consolidant. Structural rot that cannot be repaired is replaced. Failed caulk around windows, doors, and trim joints is removed and replaced with fresh paintable exterior caulk.
Priming. All bare wood, repaired areas, and any surface where the original primer is exposed receive a coat of primer matched to the substrate. Primer seals porous surfaces, blocks tannin bleed-through from cedar and redwood, and creates the adhesion layer the topcoat bonds to.
Painting: first coat. The first topcoat goes on after the primer has dried per manufacturer specifications. Professional crews typically paint trim, doors, and detail elements first, then move to the large siding surfaces. Working from the top of the building downward catches drips before they dry on finished surfaces below.
Painting: second coat. After the first coat dries (4 to 6 hours for most acrylic latex products, according to Sherwin-Williams), the second coat builds the film thickness needed for long-term UV protection, moisture resistance, and true color depth. Two coats are the industry minimum standard for a durable exterior finish.
Final inspection and cleanup. The crew conducts a walkthrough to check for holidays (missed spots), uneven coverage, drips, and edge quality. Touch-ups are completed. All masking, drop cloths, and protective coverings are removed. The site is left clean.
How Do Professionals Prepare a House for Exterior Painting?
Professionals prepare a house for exterior painting by power washing the entire surface, scraping all loose paint, sanding rough areas smooth, repairing damaged wood and caulk, and priming every bare or repaired spot before any topcoat is applied. Preparation is the phase where the quality of the final result is determined. Sharper Impressions Painting reports that prep and repair work can account for up to 85% of total project time on homes with significant existing paint failure or deferred maintenance.
The difference between professional preparation and DIY preparation is thoroughness and equipment. A professional crew uses commercial-grade pressure washers calibrated to the correct PSI for the siding material, industrial scrapers and heat guns for stubborn paint removal, and power sanders for efficient surface profiling. They know where to look for hidden damage: behind downspouts, under window sills, at butt joints where boards meet, and at the base of trim where splash-back moisture concentrates. Our crews on condominium and townhome projects check every one of these vulnerable spots because a single missed area can become a failure point that compromises the finish within a few seasons.
What Type of Paint Is the Strongest for Exteriors?
The strongest type of paint for exteriors is 100% acrylic latex, which delivers superior flexibility, UV resistance, and moisture protection compared to standard latex or oil-based formulations. Acrylic latex uses acrylic resin as its binder, producing a paint film that stretches and contracts with the substrate through seasonal temperature changes without cracking. This flexibility is critical for exterior wood siding that expands and contracts continuously with heat and humidity cycles.
Premium 100% acrylic exterior paints deliver 8 to 12 or more years of protection with less than 5% color shift over a decade, according to durability analysis from Trio Painting. Standard latex paint, which uses a vinyl-acrylic binder, offers moderate durability in the 5 to 7 year range. Oil-based paint produces a hard, smooth finish that works well on doors and trim but becomes brittle over time and is restricted in some jurisdictions due to high VOC emissions.
For community-scale professional painting projects, 100% acrylic latex is the standard recommendation because it maximizes the interval between repaint cycles, which directly reduces the community's long-term maintenance cost per year.
How Many Coats Does an Exterior Paint Job Need?
An exterior paint job needs a minimum of two coats of topcoat paint over a properly applied primer for a durable, professional-quality finish. Two coats are the industry standard cited by Sherwin-Williams, CertaPro, and every professional painting source in the market. The first coat seals the primed surface and establishes a uniform color base. The second coat builds the film thickness that provides long-term weather protection and true color depth.
A third coat may be needed for drastic color changes (dark to light or light to dark), heavily patched surfaces, or porous substrates that absorb more paint than expected on the first pass. Using a tinted primer that approximates the final color reduces the likelihood of needing a third topcoat on color-change projects.
Should You Paint Trim or Siding First?
You should paint trim, doors, and detail elements first, then paint the siding body second. Sherwin-Williams' professional exterior painting guide recommends this sequence because painting the smaller detail elements first prevents accidental drips and overspray from landing on freshly painted large siding surfaces. Any minor splatters from the trim work get covered when the siding body coat goes on afterward. Professional crews follow this trim-first sequence consistently because it produces the cleanest edges and the most efficient workflow.
What Weather Conditions Are Best for Exterior Painting?
The best weather conditions for exterior painting are dry days with temperatures between 50 and 90 degrees Fahrenheit, low humidity, and no rain in the forecast for at least 24 hours after application. Sherwin-Williams specifies this temperature range because paint cures through a chemical bonding process that requires stable, moderate conditions. Below 50 degrees, the bonding process slows dramatically and produces a weak, poorly adhered film. Above 90 degrees, the paint surface dries too fast, trapping solvents beneath a skin that later cracks and peels.
Here in the Pacific Northwest, the ideal exterior painting window runs from late May through mid-October, though early spring and late fall can work if daytime temperatures stay above 50 and surfaces are dry from overnight moisture. Professional crews monitor weather forecasts continuously during a project and build weather contingency days into the schedule. Exterior paint needs at least 24 hours to cure before exposure to rain, according to Sherwin-Williams. A crew that pushes through questionable weather to finish faster risks undermining the entire project.
How Long Does Professional Exterior Painting Take?
Professional exterior painting takes 3 to 7 days for a typical residential home, with smaller homes in good condition finishing in 2 to 3 days and larger or multi-story homes requiring 5 to 7 days or more. This timeline is the consensus across CoverPro Painting, Wine Country Painters, Inspired By Design Painting, Sharper Impressions, and multiple professional sources. The timeline includes all preparation, priming, two coats of paint, detail work, and final inspection.
For multi-building condominium and townhome communities, the total project timeline extends proportionally. A community with eight to twelve buildings may require three to six weeks of crew time, scheduled building by building to minimize disruption to residents. We plan each community project with a building-by-building timeline that accounts for prep intensity, weather windows, and resident coordination. Our experienced team has spent decades refining this scheduling process to keep projects on track without sacrificing preparation quality.
What Are Common Exterior Painting Mistakes?
The most common exterior painting mistakes are skipping or rushing surface preparation, painting in unfavorable weather, applying only one coat of topcoat, using the wrong paint for the substrate, and neglecting to prime bare or repaired surfaces. Each of these mistakes shortens the paint job's lifespan, sometimes dramatically.
Rushing preparation is the most expensive mistake. Paint applied over dirty, mildewed, or poorly scraped surfaces will peel within one to three seasons, forcing a complete redo at full cost. Preparation cannot be shortcut without consequences.
Painting in wrong weather causes adhesion failure at the chemical level. Paint applied below 50 degrees or in high humidity does not cure properly and will blister, crack, or peel prematurely.
Applying one coat instead of two saves a few hours of labor but produces a thin film that fades and chalks years sooner. The second coat is not optional for a professional-quality exterior finish.
Using the wrong product for the substrate causes adhesion failure regardless of preparation quality. Vinyl siding requires vinyl-safe acrylic paint. Wood siding requires 100% acrylic latex over a compatible primer. Stucco requires elastomeric or masonry-specific coatings.
Skipping primer on bare surfaces allows the topcoat to soak unevenly into the substrate, producing a blotchy appearance and weak bond that lifts within a few seasons.
Every one of these mistakes is avoidable by hiring a crew that follows the full preparation and application sequence outlined in this guide. Our satisfied clients confirm that the discipline of thorough preparation and correct product application is what separates a finish that lasts from one that fails early.
What Color Makes a House Look Expensive?
Colors that make a house look expensive are classic neutrals with depth, including charcoal gray, deep navy, warm white, soft greige (gray-beige blend), sage green, and rich black on accent elements like doors and shutters. The key is not any single color but the relationship between the body color, the trim color, and the accent color. A cohesive three-color scheme with clear contrast between body and trim produces the polished, intentional look that signals quality craftsmanship.
Warm whites and light grays on the body paired with crisp white trim and a deep-toned front door is the most consistently "expensive-looking" combination across architectural styles. Dark body colors (charcoal, deep navy, forest green) create a bold, dramatic presence but require premium paint with strong UV resistance because darker colors absorb more radiation and fade faster than lighter shades. You can see examples of how color selection transforms community buildings in our project portfolio.
How to Brighten Up the Outside of a House
Brightening up the outside of a house starts with a thorough cleaning to remove years of accumulated grime, followed by fresh paint in a lighter color palette with crisp white trim and updated accent colors on the front door and shutters. Sometimes the existing color is fine but the surface is so dirty, chalky, and oxidized that the house looks dull. A pressure wash alone can dramatically improve the appearance before any paint is applied. If the color itself needs updating, moving to a lighter body tone reflects more natural light and makes the home appear larger and more inviting. Our door appointment process includes a walkthrough where we help property managers and board members evaluate whether cleaning, repainting in the existing color, or a full color update is the right approach for each building.
How Long Does Exterior Paint Last?
Exterior paint lasts 7 to 10 years when a quality product is applied by professionals over properly prepared surfaces, according to Sherwin-Williams and CertaPro. Premium 100% acrylic formulations can extend that range to 8 to 12 years or more under favorable conditions. The actual lifespan depends on paint quality, surface preparation standards, climate exposure, siding material, and how well the community maintains the finish between paint cycles.
Regular maintenance extends the interval between full repaints. Annual pressure washing removes mold and dirt before they degrade the paint film. Prompt caulk and touch-up repairs prevent moisture from entering behind the paint and causing adhesion failure. Gutter maintenance prevents water from overflowing onto freshly painted surfaces. These small annual investments add years to the life of the paint job and reduce the community's long-term cost per year of protection.
Factor
Professional Exterior Painting
DIY Exterior Painting
Timeline
3 - 7 days (crew of 2-5)
2 - 4 weeks (solo or pair)
Surface Preparation
Commercial equipment, thorough scraping, repair, priming
Consumer tools, often abbreviated
Paint Lifespan
7 - 12+ years
3 - 7 years (preparation-dependent)
Safety
Scaffolding, harnesses, insurance, workers' comp
Ladders, personal risk, no coverage
Warranty
Written workmanship warranty (1 - 5 years typical)
None
Cost (2,000 sq ft home)
$3,000 - $8,000+
$500 - $1,500 (materials only)
Multi-Story Capability
Full capability with proper equipment
Limited; significant safety risk
Sources: Angi (2026), Sherwin-Williams, CertaPro, NerdWallet, Sharper Impressions Painting
Frequently Asked Questions
How Do Professional Painters Paint So Fast?
Professional painters paint fast because they work in coordinated crews of 2 to 5 people, use commercial-grade sprayers and rollers that cover more surface per pass, and follow a systematic workflow that eliminates wasted movement between tasks. A professional crew that has painted hundreds of exteriors knows exactly which tasks to run in parallel (one person masking while another scrapes), which surfaces to paint in which order, and how to manage drying times so no crew member is waiting idle. Efficiency comes from experience and process discipline, not from cutting corners on preparation or application.
What Is the Hardest Color to Paint Over?
The hardest colors to paint over are deep reds, bright yellows, and dark blues because their intense pigments bleed through standard primers and require multiple coats or specialty stain-blocking primers to fully cover. Dark-to-light color changes are harder than light-to-dark because the lighter topcoat must completely hide the darker underlying color. Using a tinted primer that approximates the new color reduces the number of topcoats needed and prevents bleed-through.
Can I Stay in My Home During an Exterior Paint Project?
Yes, you can stay in your home during an exterior paint project because all work happens on the outside of the building. Professional crews ask residents to keep windows closed during power washing and painting to prevent water and overspray from entering the home. Residents should also move vehicles away from the building during work hours and keep pets indoors when the crew is active near entrances. The crew handles all site protection and cleanup daily.
How Often Should You Repaint the Exterior of a House?
You should repaint the exterior of a house every 7 to 10 years with quality paint, or sooner if you notice peeling, cracking, fading, or bare spots. The repaint interval depends on paint quality, preparation standards, climate, and siding material. Wood siding typically needs repainting every 3 to 7 years, while fiber cement and vinyl hold paint for 10 to 15 years under normal conditions.
Do Professional Painters Offer Warranties?
Yes, most professional painters offer a written workmanship warranty covering defects in preparation and application for a specified period, typically 1 to 5 years. The warranty should state exactly what is covered (peeling, blistering, and flaking caused by improper workmanship) and what is excluded (storm damage, impact, and normal weathering). Always request warranty terms in writing before signing a contract. A contractor who stands behind their work with a written guarantee demonstrates confidence in their preparation and application standards.
What Things Make a House Look Cheap?
Things that make a house look cheap include faded or peeling paint, mismatched body and trim colors, visible patches without proper blending, dirty siding with mold streaks, neglected caulk joints, and trim elements painted the same color as the body with no contrast. Every one of these issues is correctable through professional exterior painting with proper color consultation. A cohesive three-color scheme, clean surfaces, and well-maintained edges transform the perception of any building.
Wrapping It Up
Professional exterior house painting is a structured process that protects your property, improves its appearance, and increases its value. The results depend far less on the act of applying paint and far more on what happens before the first coat goes on. Thorough preparation, correct product selection, proper application technique, and professional quality control are the factors that separate a 3-year paint job from a 10-year paint job. For condominium and townhome communities where the finish must look consistent across every building and withstand years of weather exposure, professional execution is not a luxury; it is the standard that protects the community's investment.
At Verhaalen Painting, we have been handling exterior painting for condominium and townhome communities across Oregon for over 30 years. Call us at (503) 657-5570 to discuss your next project.
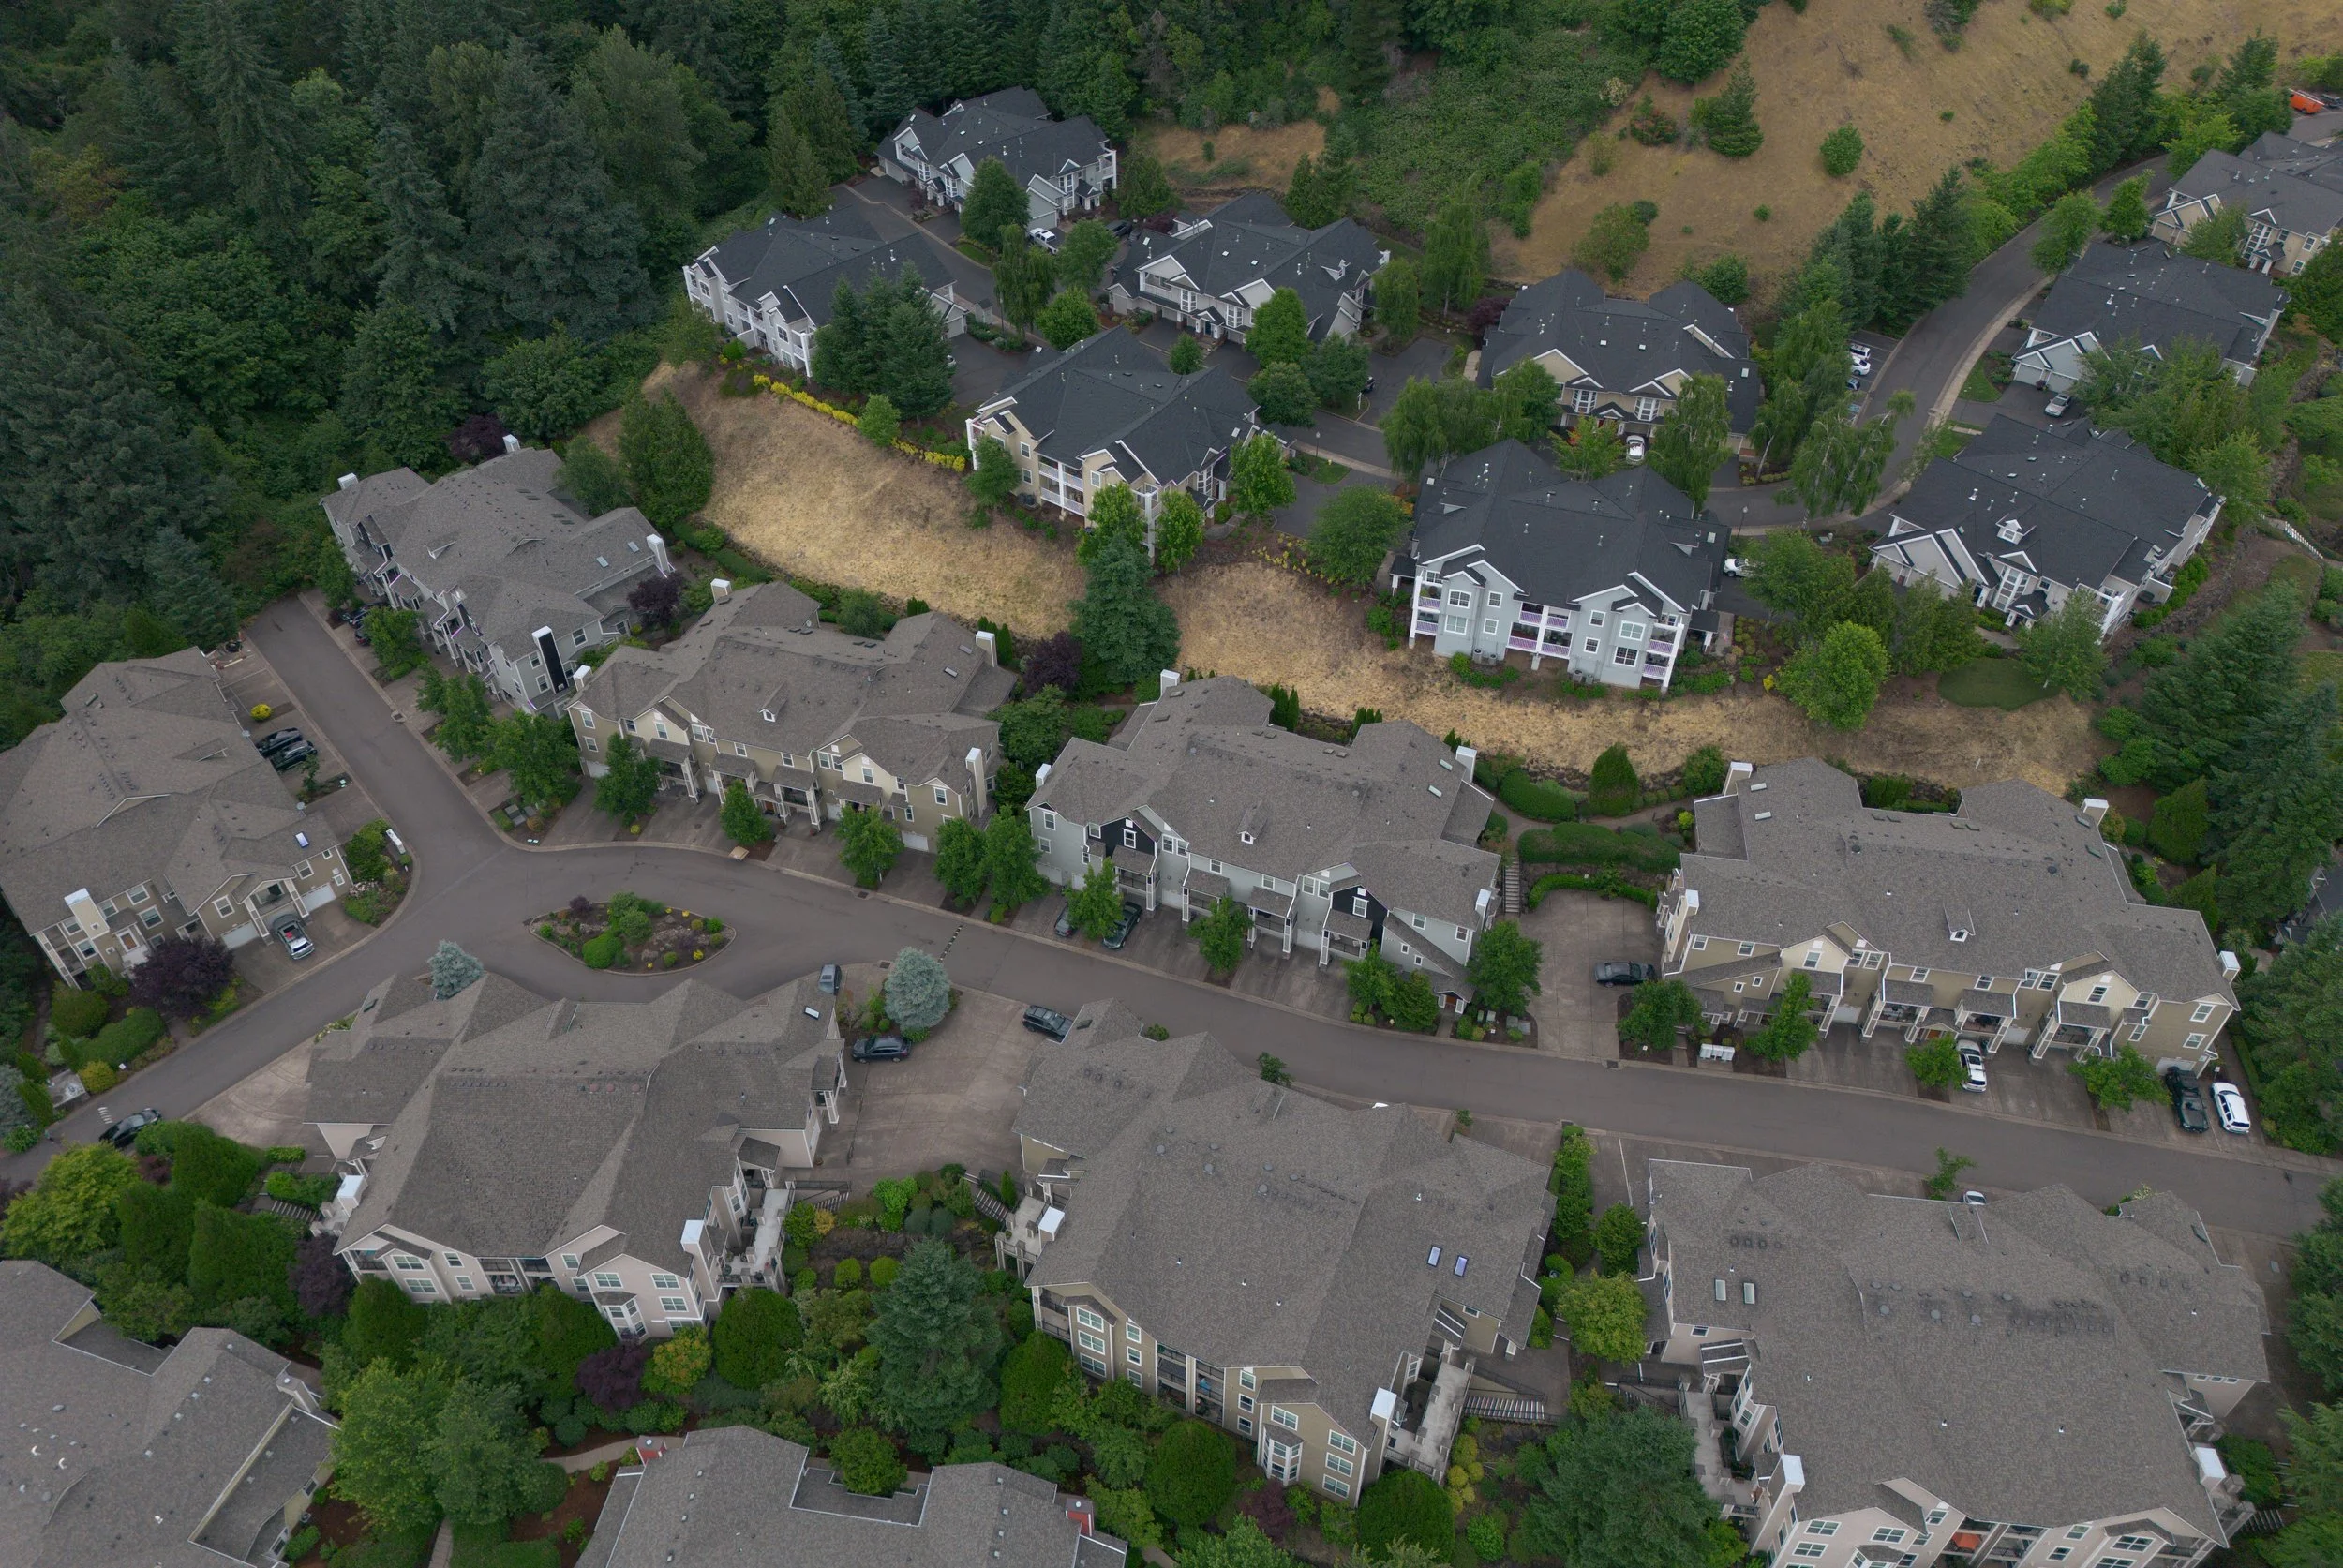
Pressure Washing Vinyl Siding and What Every Board Should Know?
Pressure washing vinyl siding safely requires 1,300 to 1,600 PSI (pounds per square inch), a 25-degree or 40-degree spray nozzle, and a technique that keeps water flowing downward to prevent it from forcing behind the panels. Done correctly, pressure washing removes mold, mildew, algae, pollen, and accumulated grime that degrade vinyl over time. Done incorrectly, excessive pressure cracks panels, drives water behind the siding into the wall sheathing, and creates damage that costs far more to repair than the cleaning itself. For condominium associations and townhome HOA boards, understanding the right approach protects the community's siding investment and keeps buildings looking their best between paint cycles. This guide covers the equipment settings, cleaning solutions, technique, common mistakes, and the community-specific planning that every board member should know before scheduling a pressure washing project.
Why Does Vinyl Siding Need Pressure Washing?
Vinyl siding needs pressure washing because dirt, mold, mildew, algae, and airborne pollutants accumulate on the surface over time, dulling the appearance and potentially degrading the material. Vinyl is a durable, low-maintenance exterior cladding with a typical lifespan of 20 to 40 years, according to data from Angi and multiple siding industry sources. Premium-grade vinyl can last up to 60 years with proper care. Regular cleaning is the most important maintenance step property managers and homeowners can take to reach the upper end of that range.
Mold and mildew thrive on the north-facing and shaded sides of buildings where moisture lingers and sunlight is limited. Left uncleaned, mold and mildew colonies spread across the siding surface, creating dark streaks and green patches that signal to residents and visitors alike that the building is not well maintained. Beyond appearance, mold growth on siding surfaces can contribute to poor outdoor air quality for residents who spend time on balconies, patios, and walkways adjacent to affected walls.
Pressure washing also serves as a critical preparation step before exterior painting. Paint applied over dirty, mildewed, or chalking vinyl does not adhere properly and will peel or blister within months. A thorough pressure wash removes every contaminant that interferes with adhesion, giving the new paint a clean foundation. We include pressure washing as a standard part of every exterior project precisely because it determines how well the finish coat performs over the following years.
How Often Should You Wash Your Vinyl Siding?
You should wash your vinyl siding once or twice per year to prevent buildup that can stain, discolor, or damage the material over time. An annual spring cleaning removes the winter accumulation of dirt, moss, and organic growth. In climates with high humidity, heavy tree cover, or persistent rain, a second wash in early fall keeps the siding clean heading into winter. Angi, Park Heights Roofing, and Home Genius Exteriors all recommend the once-or-twice-per-year frequency as the industry standard for vinyl siding maintenance.
For condominium and townhome communities with multiple buildings, annual washing is especially important because the visual impression of the community depends on consistent appearance across every structure. A building with clean siding next to one with visible mold streaks creates an uneven look that affects the entire community's curb appeal. Here in the Portland metro area, where rain and shade promote mold and algae growth on north-facing walls, many of the communities we work with schedule spring washing as a standing annual maintenance item.
What PSI Do You Need to Pressure Wash Vinyl Siding?
You need 1,300 to 1,600 PSI to pressure wash vinyl siding safely and effectively. This pressure range is strong enough to remove dirt, mold, mildew, and algae without cracking, warping, or loosening the siding panels. The consensus across Angi, House Digest, US Quality Construction, HomeSmiles, and multiple professional pressure washing sources places the safe operating window at 1,300 to 1,600 PSI for residential vinyl siding.
PSI above 2,000 risks cracking vinyl panels, especially older siding that has become more brittle from years of UV exposure. PSI above 2,500 can strip the protective finish from vinyl, force water behind panels through the overlapping joints, and even blow panels off the wall entirely. Commercial-grade pressure washers that produce 3,000 to 4,000 PSI should never be used on vinyl siding at full pressure. Starting at the lowest effective setting and increasing gradually is the safest approach.
The nozzle tip matters just as much as the PSI setting. A 25-degree (green) nozzle spreads the water stream into a wide fan that distributes pressure evenly across the siding surface. A 40-degree (white) nozzle spreads the stream even wider for gentler cleaning on delicate or older siding. A 0-degree (red) nozzle concentrates the stream into a pinpoint blast that will crack vinyl instantly and should never be used on siding under any circumstances.
How Far Should You Hold a Pressure Washer From Vinyl Siding?
You should hold a pressure washer at least 6 to 12 inches from vinyl siding to distribute the water pressure across a wide enough area to clean without causing damage. Many professional sources recommend starting 3 to 5 feet away from the surface and moving closer gradually until you find the distance that removes dirt effectively without moving or flexing the siding panels. If you see the siding panels lifting, flexing, or vibrating under the water stream, you are too close or your pressure is too high.
Can Pressure Washing Damage Vinyl Siding?
Yes, pressure washing can damage vinyl siding if the PSI is too high, the nozzle is too narrow, the distance is too close, or the water is directed upward instead of downward. The most common types of pressure washing damage on vinyl siding include:
Cracked or punctured panels from concentrated high-pressure streams, especially with narrow 0-degree or 15-degree nozzle tips
Water intrusion behind siding panels caused by spraying upward into the overlapping joints, which forces water into the wall cavity and onto the sheathing underneath
Stripped protective finish from prolonged exposure to high pressure in one spot, which accelerates UV fading and makes the siding more vulnerable to future discoloration
Loosened or dislodged panels from excessive force that pulls the siding free from the nailing strips that hold it to the wall
Damaged window screens, light fixtures, caulk joints, and weatherstripping from direct high-pressure spray contact
Every one of these damage types is preventable by using the correct PSI range, the correct nozzle, the correct distance, and the correct spray angle. When we power wash vinyl-sided buildings, our crews verify equipment settings before starting and inspect the siding condition during the process to catch any issues immediately.
What Is the Best Thing to Pressure Wash Vinyl Siding With?
The best thing to pressure wash vinyl siding with is a purpose-formulated vinyl siding detergent applied through the pressure washer's detergent injection system, which loosens mold, mildew, and grime before the rinse pass removes them. Water alone removes surface dust and pollen, but it does not kill mold or mildew spores. A cleaning solution breaks the bond between organic growth and the vinyl surface so the water rinse carries everything away.
Cleaning Solution
Best For
Mix Ratio
Notes
Vinyl siding detergent (commercial)
General cleaning, mold, mildew, dirt
Per manufacturer label
Safest all-purpose option; biodegradable formulas available
White vinegar and water
Light mold and mildew
30% vinegar / 70% water
Non-toxic, safe for landscaping; mild cleaning power
Oxygen bleach (sodium percarbonate)
Heavy mold, mildew, algae
Per product label (typically 1 cup per gallon)
Safer than chlorine bleach; effective on organic growth
Chlorine bleach and water
Severe mold or mildew staining
1 part bleach / 10 parts water
Kills mold effectively but can harm plants; rinse landscaping thoroughly
Sources: Angi (2026), HomeSmiles, Boss Exteriors, Window World NWLA, multiple professional pressure washing sources
For community-scale projects where multiple buildings are washed over several days, a commercial vinyl siding detergent is the most practical choice because it balances cleaning effectiveness with landscaping safety. Bleach-based solutions require covering shrubs, flower beds, and ground cover with plastic sheeting before application, which adds time and labor on large multi-building projects.
What Should You Not Clean Vinyl Siding With?
You should not clean vinyl siding with undiluted bleach, organic solvents like acetone or lacquer thinner, abrasive cleansers, or any product containing chlorine in concentrations above 10% by volume. Undiluted bleach damages vinyl's protective surface coating and kills surrounding vegetation on contact. Organic solvents dissolve the PVC (polyvinyl chloride) material itself, causing permanent discoloration, softening, and surface pitting. Abrasive powder cleansers scratch the finish and create rough spots that collect dirt faster than the surrounding smooth surface.
What Takes Oxidation Off Vinyl Siding?
Oxidation comes off vinyl siding through a combination of a dedicated vinyl restoration product or an oxygen bleach solution and gentle scrubbing with a soft-bristle brush before pressure rinsing. Oxidation appears as a chalky, faded film on the siding surface, particularly on south-facing and west-facing walls that receive the most UV exposure. The chalky residue is degraded PVC material that has broken down under ultraviolet radiation. A vinyl restoration cleaner contains mild surfactants that dissolve the oxidized layer without damaging the intact material underneath. After applying the restoration cleaner and allowing 5 to 10 minutes of dwell time, a gentle pressure rinse at 1,300 PSI with a 40-degree nozzle removes the loosened oxidation and reveals the brighter surface beneath. Severely oxidized siding may require two treatment cycles to restore its appearance. Our completed community projects include oxidation restoration on buildings where years of sun exposure had dulled the original color.
How Do Professionals Clean Vinyl Siding?
Professionals clean vinyl siding using a method called soft washing, which combines low-pressure water delivery (typically 500 to 1,000 PSI) with a specialized cleaning solution that does the actual work of killing mold and lifting dirt, followed by a thorough rinse. Soft washing relies on the chemical action of the detergent rather than the mechanical force of high-pressure water, which makes it significantly safer for vinyl panels, window seals, caulk joints, and light fixtures.
The professional soft washing process follows a specific sequence. The crew applies the cleaning solution from bottom to top using low pressure, which prevents dirty runoff from streaking across dry siding below the work area. The solution dwells on the surface for 5 to 10 minutes, allowing the active ingredients to break down mold, mildew, and algae colonies at the root level. The crew then rinses from top to bottom using moderate pressure (1,300 to 1,600 PSI), which flushes all loosened contaminants downward and off the building. Rinsing from the top ensures that every surface below receives a final clean pass.
For HOA boards evaluating pressure washing proposals, asking whether the contractor uses a soft wash method versus straight high-pressure washing is one of the most important questions in the selection process. Soft washing produces better cleaning results with far less risk of damage to the siding, windows, and trim elements of the building.
Should You Wash Vinyl Siding From the Top Down or Bottom Up?
You should apply cleaning solution from the bottom up and rinse from the top down when washing vinyl siding. Applying detergent from the bottom up prevents dirty solution from running down over dry siding and creating streaks that are difficult to remove. Rinsing from the top down flushes all loosened dirt and cleaning solution off the building in a single downward pass. This two-direction technique is the industry standard because it produces the most even, streak-free result.
What Happens If Water Gets Behind Vinyl Siding?
Water that gets behind vinyl siding soaks into the wall sheathing, insulation, and framing, which can cause mold growth, wood rot, and structural damage that is invisible from the outside until the problem becomes severe. Vinyl siding is designed to overlap at the horizontal joints, with each panel hooking into the one below it. This overlap sheds rainwater naturally when it runs downward across the face of the siding. Pressure washing at an upward angle forces water into these joints from below, reversing the natural drainage direction and pushing water directly into the wall cavity.
Moisture trapped behind vinyl siding creates the ideal conditions for mold and wood-destroying fungi to colonize the oriented strand board (OSB) or plywood sheathing. In multi-story condominium buildings, water that enters at one floor can travel downward through the wall cavity and cause damage on floors below, making the source difficult to identify. Vinyl siding repair costs range from $4 to $11 per square foot, according to Angi, and sheathing replacement behind the siding can push costs significantly higher. The property managers we work with understand that proper technique during pressure washing is not optional; it is the difference between maintaining the building and creating a hidden problem inside the wall.
Should You Pressure Wash Vinyl Siding Before Painting?
Yes, you should pressure wash vinyl siding before painting because paint will not adhere properly to a surface covered in dirt, mold, mildew, chalking residue, or oxidation. Pressure washing is the mandatory first step in any exterior painting project on vinyl-sided buildings. The wash removes every contaminant that would prevent the primer and paint from bonding to the vinyl substrate.
After pressure washing, the siding must dry completely before any primer or paint is applied. Drying time depends on weather conditions, but 24 to 48 hours is the standard window for vinyl siding in moderate climates. In humid or rainy conditions, drying may take longer. Painting over damp vinyl traps moisture beneath the paint film, which causes blistering and adhesion failure. We build this drying period into every exterior painting project timeline so the paint job starts on a clean, dry surface.
How to Make Your Vinyl Siding Look New Again
Making vinyl siding look new again requires a thorough pressure wash with the right detergent to remove all surface contamination, followed by oxidation treatment on faded areas, and minor repairs to any cracked or damaged panels. The combination of these three steps restores the clean, uniform appearance that the siding had when it was first installed.
Pressure wash the entire exterior. Use 1,300 to 1,600 PSI with a 25-degree nozzle and a vinyl-safe detergent. Apply detergent from the bottom up, let it dwell 5 to 10 minutes, and rinse from the top down.
Treat oxidized areas. Apply a vinyl restoration cleaner or oxygen bleach solution to chalky, faded sections. Scrub gently with a soft-bristle brush and rinse at low pressure. Repeat if necessary on heavily oxidized panels.
Repair damaged panels. Replace cracked, warped, or broken panels. Reseal any failed caulk joints around windows, doors, and trim. Reattach any panels that have loosened from their nailing strips.
Consider painting. If the siding is structurally sound but significantly faded or discolored beyond what cleaning can restore, painting with a vinyl-safe exterior acrylic paint in a color equal to or lighter than the original provides a full refresh without the cost of siding replacement.
Can You Paint 20 Year Old Vinyl Siding?
Yes, you can paint 20 year old vinyl siding as long as the panels are structurally intact, free of warping and cracking, and thoroughly cleaned before painting. Painting vinyl siding costs $600 to $4,000 on average, according to Angi, which is significantly less than full siding replacement. The paint must be a vinyl-safe acrylic latex formulation, and the color selected should be equal to or lighter than the original siding color. Darker colors absorb more heat, which can cause vinyl panels to expand beyond their engineered tolerance and warp. A professional painting team selects the right product and color range to protect the siding while delivering the fresh appearance the community wants.
What Every HOA Board Should Know About Community Pressure Washing
Every HOA board should know that community-scale pressure washing requires advance scheduling, resident notification, landscaping protection, contractor insurance verification, and coordination with any planned painting work to avoid washing twice. Pressure washing a single-family home is a weekend project. Pressure washing a multi-building condominium or townhome community is a multi-day operation that affects residents, landscaping, vehicles, and common areas across the property.
Start by scheduling the work during a dry weather window. The washing itself takes approximately 2 hours per average-sized building, but the full project across multiple buildings may span several days. Notify residents at least one week in advance with the specific dates their building will be washed. Residents need to close all windows and doors, move patio furniture away from walls, and keep pets indoors during the washing process. Cars parked near the building should be moved to avoid overspray.
Landscaping protection is critical. Detergent runoff, even from mild cleaning solutions, can damage plants and grass if not rinsed promptly. A professional crew covers sensitive plantings with plastic sheeting before applying detergent and rinses all landscaping thoroughly after the building wash is complete.
Verify that the contractor carries general liability insurance and workers' compensation coverage. Water intrusion damage from improper pressure washing technique can cost thousands to repair, and you want the contractor's insurance to cover any mistakes, not the community's reserve fund. Ask for a certificate of insurance naming the HOA as an additional insured before work begins. If you need help evaluating proposals, our team can walk you through what a complete scope of work should include.
If the community plans to paint within the same season, coordinate the pressure washing with the painting schedule. Washing immediately before painting eliminates the need to wash the building twice and gives the paint crew a clean, dry surface to work on. We help boards plan this coordination when they schedule a consultation to discuss their annual maintenance timeline.
Frequently Asked Questions
What Is the Average Lifespan of Vinyl Siding?
The average lifespan of vinyl siding is 20 to 40 years, with premium-grade products lasting up to 60 years when properly maintained. The wide range reflects differences in vinyl thickness, UV-resistant coatings, installation quality, and maintenance frequency. Thicker siding (0.044 inches or more) resists impact and weathering better than thinner panels, according to data from Rescue My Roof. Regular annual washing and prompt repair of damaged panels help vinyl reach the upper end of its expected lifespan.
What Color Vinyl Siding Fades the Most?
Darker colors of vinyl siding fade the most because they absorb more ultraviolet radiation, which breaks down the pigment molecules in the vinyl surface faster than lighter colors. Deep reds, dark blues, black, and forest green show visible fading sooner than white, cream, beige, and light gray. Modern vinyl siding manufacturers add UV-resistant coatings to all colors, but the physics of light absorption means darker shades will always fade faster on sun-exposed walls. South-facing and west-facing elevations fade the most because they receive the most direct sunlight hours per day.
How Much Does Professional Pressure Washing Cost?
Professional pressure washing costs approximately $0.15 to $0.75 per square foot, or $200 to $600 for a typical single-family home exterior. Multi-building condominium and townhome communities receive per-building or per-project pricing that reflects the economies of scale from washing multiple structures in a single mobilization. The total cost depends on the number of buildings, the amount of surface area, the severity of mold or mildew growth, and whether the washing is a standalone maintenance service or part of a larger painting project.
Can You Pressure Wash Vinyl Siding in Cold Weather?
You can pressure wash vinyl siding in cold weather as long as the temperature stays above 40 degrees Fahrenheit, because freezing temperatures turn water into ice on the siding surface and create a slip hazard on walkways and driveways below. Cold vinyl is also more brittle than warm vinyl, which increases the risk of cracking under pressure. The ideal temperature range for pressure washing vinyl siding is 50 to 80 degrees, which in Oregon means the best window runs from late April through October.
Is Soft Washing Safer Than Pressure Washing for Vinyl Siding?
Yes, soft washing is safer than high-pressure washing for vinyl siding because it uses lower water pressure (500 to 1,000 PSI) combined with a cleaning solution that does the work of removing mold and grime, reducing the risk of panel damage and water intrusion. Most professional exterior cleaning companies now use soft washing as their standard method for vinyl-sided buildings. The detergent kills mold and mildew at the root level, which means the organisms do not grow back as quickly as they do after a water-only pressure wash. Soft washing produces a longer-lasting clean with less mechanical stress on the siding material.
The Takeaway
Pressure washing vinyl siding is one of the most effective and affordable ways to maintain a community's exterior appearance, protect the siding investment, and prepare surfaces for painting. The key is using the right pressure (1,300 to 1,600 PSI), the right nozzle (25-degree or 40-degree), the right detergent, and the right technique (apply bottom-up, rinse top-down, never spray upward into panel joints). For condominium and townhome boards, adding annual pressure washing to the maintenance calendar extends siding lifespan, reduces the frequency of costly repaints, and keeps every building in the community looking its best.
At Verhaalen Painting, power washing is a core part of our exterior maintenance and pre-paint preparation services for condominium and townhome communities. Call us at (503) 657-5570 to discuss your community's next washing or painting project.
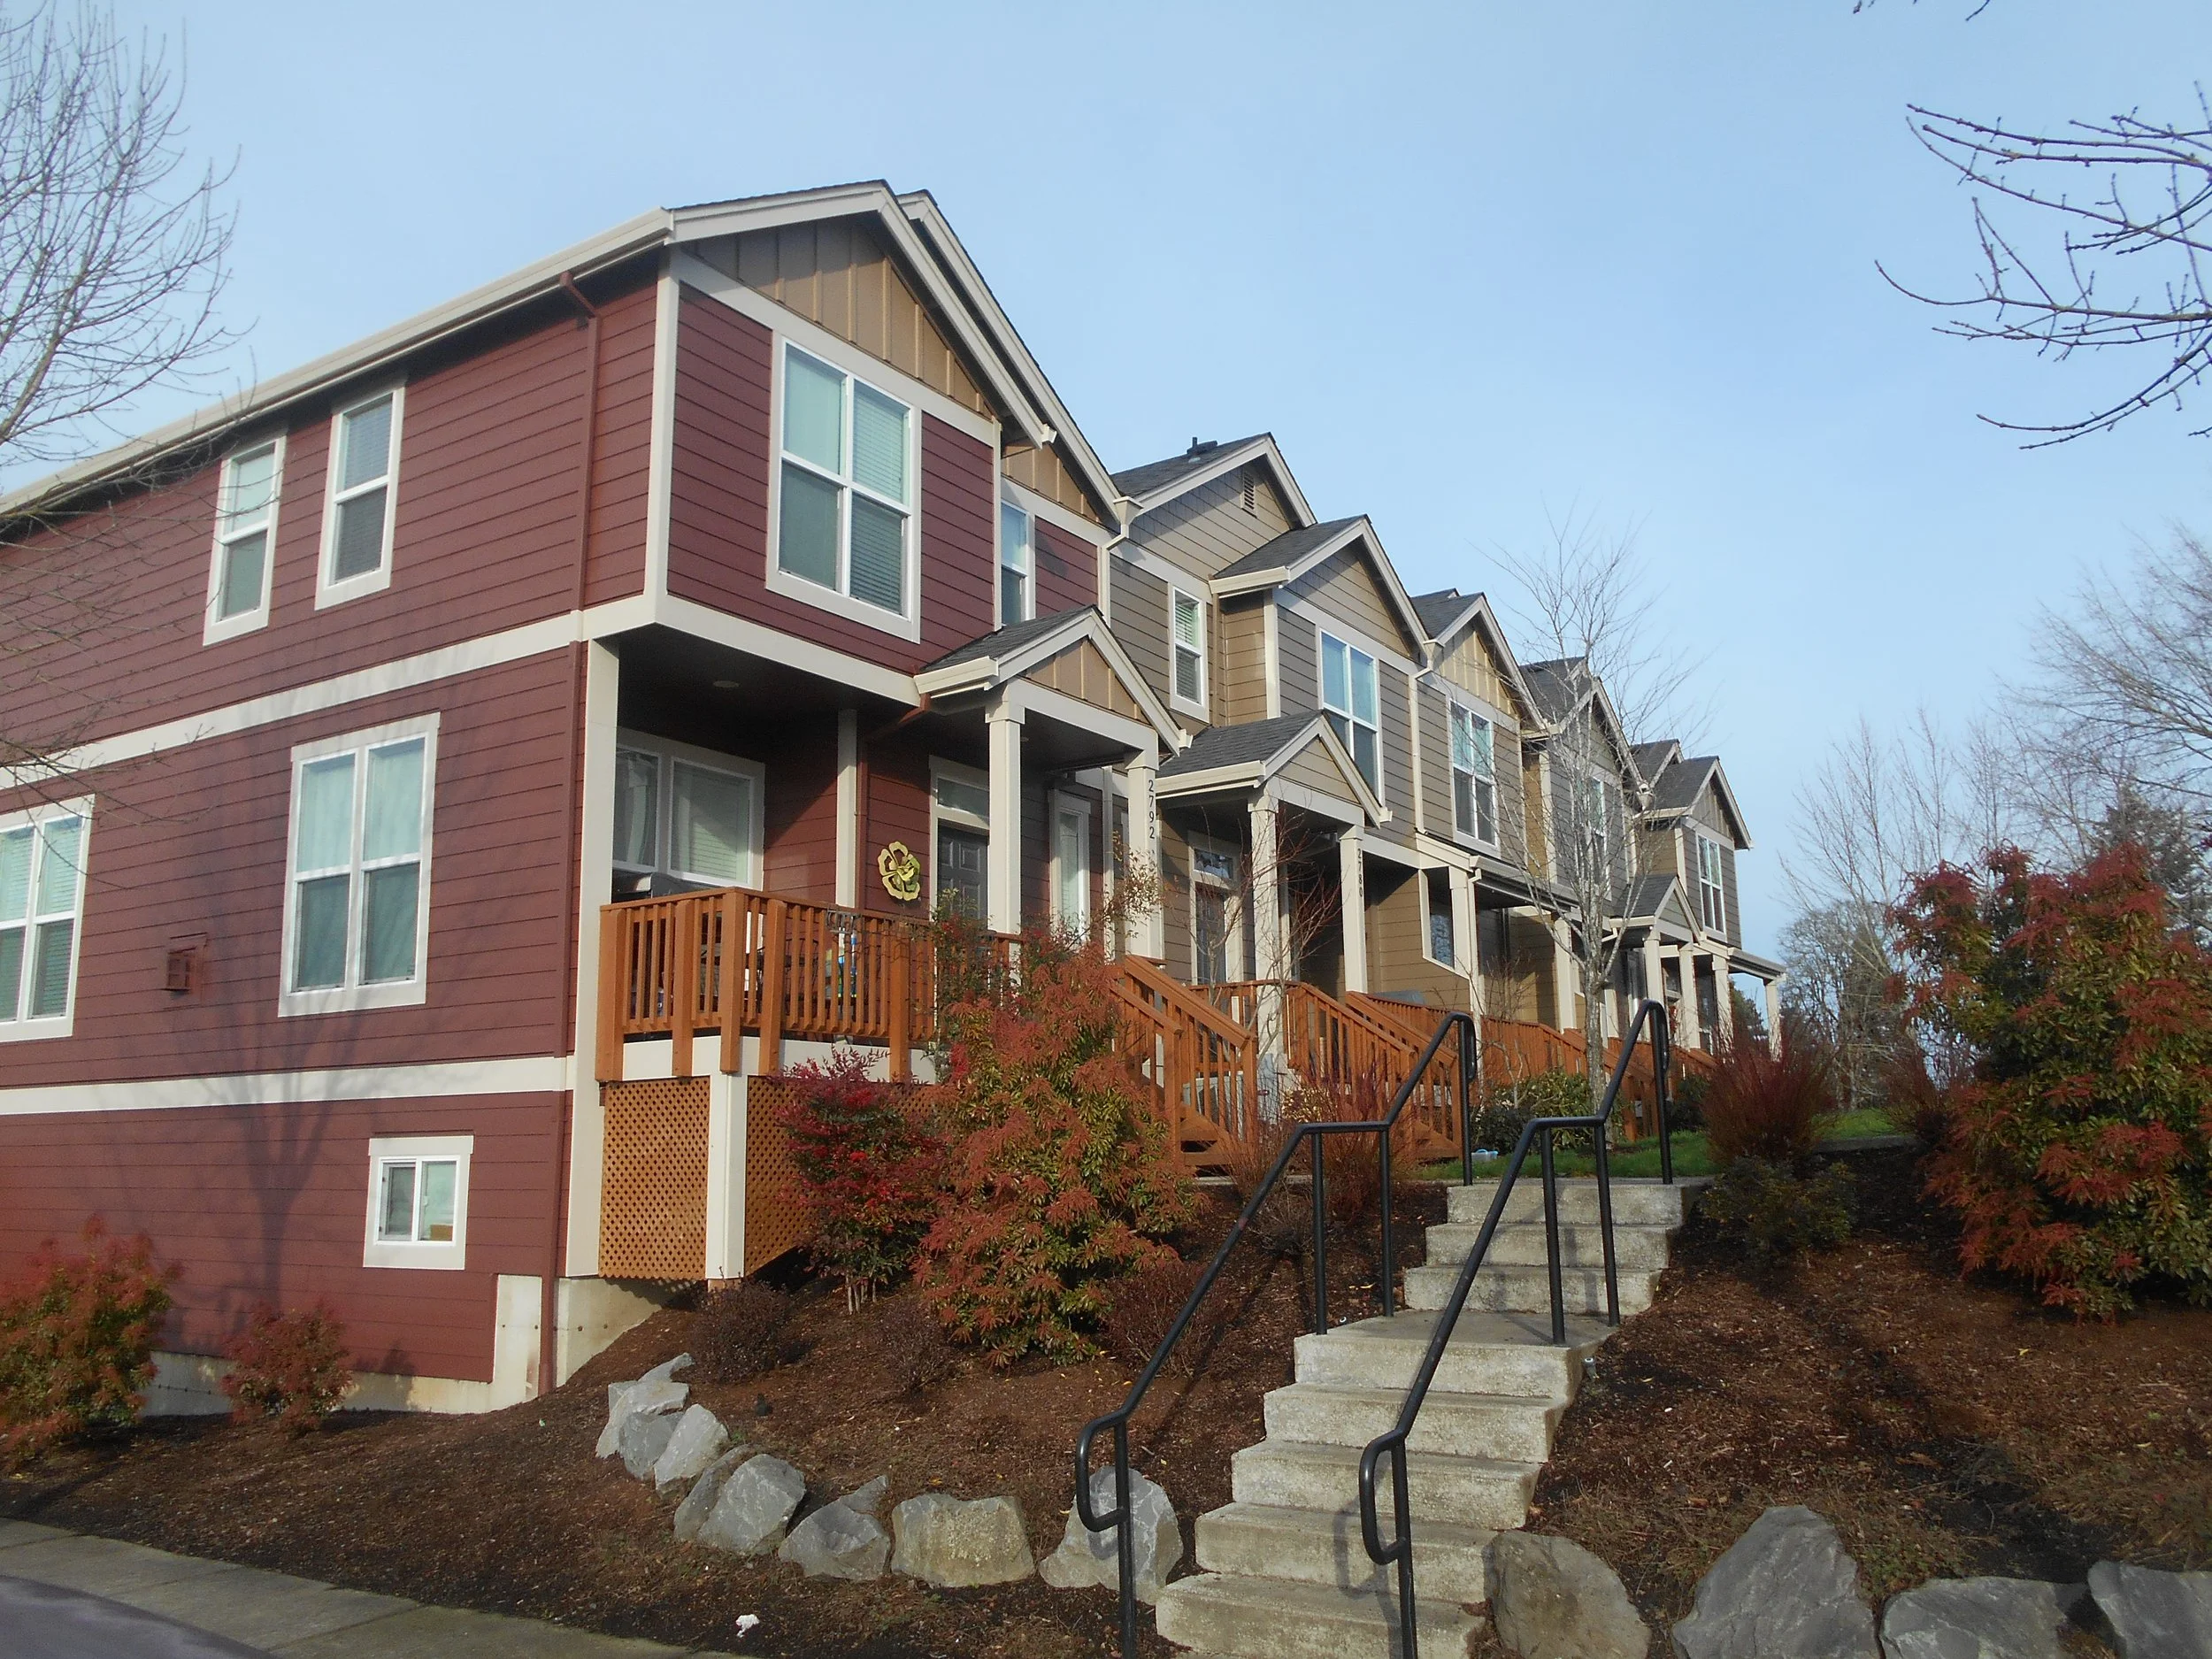
Exterior House Painting Ideas Your Community Will Actually Love
The strongest exterior house painting ideas for 2026 center on warm, nature-inspired tones that replace the cool grays of the past decade, organized into three-color schemes (body, trim, accent) that create a polished, cohesive look across the entire community. Sherwin-Williams named Universal Khaki SW 6150, a warm earthy neutral, as its 2026 Color of the Year. Behr selected Hidden Gem, a grounded sage green. Pantone chose Cloud Dancer, a serene off-white. The message from every major paint manufacturer is clear: warmth, depth, and connection to the natural landscape define the direction exterior color is moving. For condominium and townhome communities choosing their next repaint palette, these trends offer a roadmap to colors that look current, age well, and earn genuine approval from residents. This guide covers the top color families for 2026, how to build a three-color scheme, what makes a community look expensive, which colors to avoid, and how HOA boards can manage the color selection process so the result is something everyone actually loves.
What Is the Trend in Exterior Paint for Houses?
The trend in exterior paint for houses is a decisive shift away from cool grays toward warm, earth-inspired neutrals, biophilic greens, and moody dark tones that feel grounded, welcoming, and connected to the surrounding landscape. For the past decade, cool gray dominated exterior color choices across residential and commercial properties. In 2026, designers, builders, and homeowners are moving toward palettes with visible warmth: creamy whites, soft taupes, sage greens, and deep charcoals with brown undertones rather than blue.
Milgard's 2026 exterior color trend analysis identifies three dominant directions: warm neutral shades like greige and khaki, nature-inspired greens from sage to deep forest, and dramatic dark finishes in charcoal, navy, and smoky black. The New Home Star builder's guide to 2026 paint trends confirms the same movement, noting that builders are actively shifting away from stark whites and cool grays and embracing soft warm whites, creamy beiges, mushroom taupes, muted sages, and clay tones.
What makes this shift relevant for condominium and townhome communities is that the new palette works better across multiple buildings than cool gray ever did. Warm neutrals complement natural landscaping, adapt to changing light conditions through the seasons, and create a unified feel across buildings without looking monotonous. We see this firsthand on our community painting projects, where the right warm palette transforms the entire property's presence.
What Color Is Replacing Gray in 2026?
The colors replacing gray in 2026 are greige (a gray-beige blend with warm brown undertones), soft taupe, mushroom neutrals, and warm khaki tones that maintain the sophistication of gray while adding the warmth that cool grays lack. Sherwin-Williams' 2026 Color of the Year, Universal Khaki SW 6150, sits at the center of this transition. Universal Khaki reads as a refined, earthy neutral that looks warm in full sun and sophisticated in shade.
The shift is not about abandoning gray entirely. Greige, which blends gray and beige in roughly equal proportions, preserves the clean, modern quality of gray while eliminating the cold, sterile feel that many homeowners and residents have grown tired of. Davis Painting's 2026 exterior analysis notes that warm taupes and sandstone tones work especially well on Colonial, Cape Cod, Ranch, and contemporary architectural styles. One Stop Painting confirms that homeowners are finding that cooler gray tones feel too flat and cold, especially on homes surrounded by natural landscaping and seasonal color variation.
For HOA boards managing a community repaint, greige and warm taupe are the safest transition colors from an existing gray scheme because they update the look without requiring residents to adjust to a dramatically different appearance. The change reads as a refinement, not a departure.
What Is the Exterior Color for 2026?
The exterior colors for 2026 fall into six dominant families: warm whites, greige/khaki, sage green, deep charcoal, navy blue, and taupe/mushroom. Each family offers a range of specific shades, and the best community color schemes often combine two or three families into a cohesive palette.
Color Family
Character
Best Trim Pairing
Best Accent
Warm White / Cream
Clean, bright, welcoming; avoids the starkness of pure white
Crisp white or soft ivory
Black, navy, or sage green door
Greige / Khaki
Sophisticated neutral; balances gray and beige
White or warm cream
Deep charcoal or burgundy door
Sage Green
Nature-connected, calming; harmonizes with landscaping
Warm white or cream
Black, dark bronze, or wood-tone door
Deep Charcoal
Bold, architectural, modern; reads as refined near-black
White or light warm gray
Warm wood, brass hardware, red door
Navy Blue
Classic, timeless; strong curb appeal across styles
Crisp white
Red, brass, or natural wood door
Taupe / Mushroom
Warm, earthy, versatile; works on traditional and modern
White or soft cream
Black, deep green, or terracotta door
Sources: Milgard 2026 Exterior Color Trends, Sherwin-Williams, Behr, Davis Painting, 3D Home Improvements, Facade Colorizer
Sage green is the breakout color of 2026. Behr's Hidden Gem, Valspar's Warm Eucalyptus, and multiple designer picks all land in the sage-to-olive range. Sage green exteriors harmonize with natural wood accents, black metal hardware, and surrounding vegetation. For communities with mature landscaping, sage green on the body with warm white trim creates a look that feels like the buildings belong to the landscape rather than sitting on top of it.
What Exterior Color Makes a House Look Expensive?
The exterior colors that make a house look expensive are deep, saturated neutrals with clear contrast between the body color and the trim, paired with a bold, intentional accent on the front door. Milgard's trend analysis states that neutral colors, dark hues, and gem tones add a high-end, sophisticated feel. The key is not any single shade but the deliberate contrast between elements. A charcoal body with crisp white trim and a deep red or brass-accented door looks intentional and curated. A single color applied to body, trim, and door with no contrast looks flat and uninvested.
For condominium and townhome communities, the "expensive" look comes from consistency across buildings combined with thoughtful variation on accent elements. Every building in the community shares the same body and trim colors, establishing visual unity. Individual unit front doors or entry accents can vary within an approved palette, giving residents personal expression within the community's framework. This approach signals that the community is well-managed, aesthetically considered, and worth the investment. Our exterior painting projects use this body-trim-accent framework because it produces the most polished result at the community scale.
What Is a Three-Color Exterior Paint Scheme?
A three-color exterior paint scheme uses one color for the siding body, a second color for the trim and fascia, and a third color for the front door and accent elements. This three-color approach is the industry standard for residential and community exterior painting because it creates visual depth, defines architectural features, and gives the building a polished, designed appearance that a single color cannot achieve.
The body color covers the largest surface area and sets the overall tone. It should be a color the community can live with for 7 to 10 years, which is the standard repaint interval for a quality professional exterior paint job. Warm whites, greige, sage green, and taupe are the strongest body color choices for 2026 because they are current without being trendy, which means they will still look relevant when the next repaint cycle arrives.
The trim color frames the building. White remains the most popular trim color because it creates clean, crisp contrast against virtually any body color. Warm cream or soft ivory trim pairs better with warm body colors like greige and taupe, while bright white trim pairs better with cooler body colors like navy and charcoal.
The accent color is the smallest element but carries the most visual impact. A bold front door color, such as deep red, black, navy, or forest green, draws the eye and creates a focal point that makes the entire building feel intentional. On community projects, we recommend an approved accent palette of 3 to 5 door colors that residents can select from, which maintains variety within a coordinated framework.
How Do HOA Boards Choose Colors the Community Will Love?
HOA boards choose colors the community will love by combining professional color consultation with a structured resident feedback process, testing samples on actual building surfaces, and selecting palettes that balance current trends with long-term livability. Color selection at the community level is fundamentally different from choosing paint for a single home because the decision affects every resident, every unit's perceived value, and the community's identity for the next decade.
Start with professional guidance. A professional painter or color consultant evaluates the community's architectural style, existing materials (stone, brick, siding type), landscaping, and surrounding environment. These fixed elements narrow the appropriate color range before any personal preferences enter the conversation.
Develop 2 to 3 palette options. Present the board and residents with two or three complete palettes (body, trim, accent) rather than individual color swatches. Seeing a complete scheme prevents the confusion that comes from evaluating isolated colors without context.
Test on the actual building. Paint large sample patches (at least 4 by 4 feet) on one building and evaluate them at different times of day: morning sun, midday, late afternoon shadow, and overcast conditions. Colors shift dramatically under different light. A color that looks warm and inviting at midday can look muddy or cold in shade. Here in the Pacific Northwest, where overcast conditions are frequent, testing under gray skies is especially important.
Gather resident feedback on the tested samples. Send a brief survey or hold an open viewing period where residents can see the actual painted samples on the building and provide input. Framing the choice as "Palette A or Palette B" rather than open-ended "what color do you want" keeps the process productive and prevents decision paralysis.
Select for longevity, not just trend. The colors should still look current at the end of their 7 to 10 year lifespan. Warm neutrals, classic greens, and timeless whites meet this standard. Ultra-trendy colors that peak in popularity for a single season often feel dated within a few years.
We walk every board and property manager through this selection process because getting the color right before the crew starts is far more efficient than discovering after 10 buildings are painted that the community is not happy with the result.
What Colors Hide Wear on Exterior Siding?
Colors that hide wear on exterior siding are mid-toned neutrals in the greige, taupe, sage green, and medium gray families, which conceal dust, minor staining, pollen accumulation, and early-stage chalking better than very light or very dark colors. Pure white and very light creams show every dirt streak, mildew spot, and water stain. Very dark colors show chalking, fading, and dust accumulation more visibly because the degraded surface creates a lighter film on top of the dark base.
Mid-tones occupy the sweet spot. A medium greige body with white trim stays cleaner-looking between annual washings than a pure white body. A sage green body blends naturally with pollen and organic debris that accumulates on siding surfaces in wooded or landscaped environments. For communities where annual pressure washing is part of the maintenance program, color choice becomes less critical. For communities that wash less frequently, choosing a body color that forgives between cleanings extends the time the buildings look their best. Our satisfied clients frequently tell us that the mid-tone body colors we recommended have kept their buildings looking fresh longer than they expected.
What Color Is Not Recommended for Exterior Use?
Colors not recommended for exterior use include bright, highly saturated reds, yellows, and oranges because they fade rapidly under UV exposure, as well as very dark black tones on vinyl siding because excessive heat absorption can cause warping. Bright pigments in the red and yellow spectrum are chemically less stable under ultraviolet radiation than pigments in the blue, green, and neutral families. A vivid red siding body that looks striking on day one can shift to a washed-out salmon within two to three years of full sun exposure.
Very dark colors on vinyl siding present a different problem. Vinyl expands and contracts with heat. A dark body color absorbs significantly more solar radiation than a light one, causing the siding to reach higher temperatures and expand beyond its engineered tolerance. The result can be warped, buckled, or distorted panels. For vinyl-sided communities, the safest approach is selecting body colors in the light-to-medium range and reserving dark tones for accents like doors, shutters, and limited trim elements.
What Paint Colors Do Homeowners Most Regret Using?
The paint colors homeowners most regret using are ultra-trendy shades that feel dated within a few years, colors that looked good on a small swatch but too intense at full-building scale, and overly bold choices that clash with neighboring properties. A color that works beautifully on a single accent wall inside a home can overwhelm an entire building exterior where thousands of square feet amplify the intensity. The most common color regrets include:
Choosing a color from a small swatch without testing it at full scale on the building, then finding it looks completely different across thousands of square feet
Selecting a highly saturated or trendy color that feels exciting at first but dated within two to three years
Picking a very light color that shows every dirt streak, mildew spot, and water stain between washings
Choosing a dark color on vinyl siding that causes heat-related warping and buckling
Using a single color on body, trim, and accents with no contrast, producing a flat, one-dimensional appearance
Testing at scale, on the actual building surface, prevents this regret. The most durable exterior color choices are ones that feel intentional but not attention-seeking, current but not fleeting, and complementary to the surrounding buildings and landscape. If your board is ready to explore options, reach out to our team and we can bring sample palettes to your property.
Do Exterior Paint Colors Affect Property Value?
Yes, exterior paint colors affect property value because curb appeal is the first impression buyers form, and the National Association of Realtors' 2025 Remodeling Impact Report ranks painting the home as the number one project Realtors recommend before listing. Fifty percent of surveyed Realtors recommend painting the entire home before sale. The project receives a homeowner Joy Score of 8.8 out of 10, confirming high satisfaction from those who invest in it.
For condominium and townhome communities, the color of every building affects the perceived value of every unit. A community with faded, dated, or mismatched building colors signals deferred maintenance. A community with a cohesive, current palette signals active management, pride of ownership, and a board that invests in the property. You can see the difference a unified color scheme makes in our portfolio of community projects. This perception translates directly into resale values and the speed at which units sell.
What Are the Best Paint Colors to Sell a House in 2026?
The best paint colors to sell a house in 2026 are warm whites, soft greige, light taupe, and sage green on the body, paired with crisp white trim and a statement front door in black, navy, or deep red. These colors appeal to the broadest range of buyers because they feel modern without being polarizing. Davis Painting's 2026 analysis confirms that warm neutrals with crisp white trim are a tried-and-true combination that works across different home styles and feels clean, comfortable, and current.
What Color Never Goes Out of Style?
White never goes out of style as an exterior paint color because it reflects light, makes buildings appear larger and cleaner, pairs with any accent color, and adapts to every architectural style from colonial to contemporary. The specific shade of white evolves with trends. In 2026, warm whites with cream or ivory undertones are preferred over the stark, cool whites that dominated earlier decades. But white in some form has been the most popular exterior color choice for residential and community buildings for over a century, and nothing on the trend horizon suggests that will change.
For communities seeking a timeless palette that will never look dated, a warm white body with a slightly brighter white trim and rotating accent door colors at each repaint cycle provides a framework that stays relevant indefinitely. The door color can update with trends every 7 to 10 years without touching the body or trim. To explore how this approach would look on your specific community buildings, our team can bring sample palettes to your next board meeting or property walkthrough.
Frequently Asked Questions
What Paint Colors Are Outdated?
Paint colors that feel outdated in 2026 are cool, blue-undertone grays that dominated the 2015 to 2022 era, stark pure whites without warmth, and beige tones without depth or character. These colors are not "wrong" in any absolute sense, but they read as dated to buyers, visitors, and residents who have absorbed the warm-tone shift through media, new construction, and neighboring properties that have already updated. Replacing a cool gray with a warm greige or a flat beige with a layered taupe immediately modernizes a community's appearance.
Is Gray Coming Back in 2026?
Gray is not coming back in its cool, blue-undertone form, but warm grays with brown, taupe, or mushroom undertones remain relevant and are classified under the broader greige family. The difference is subtle but significant. A gray with blue undertones reads as cold and clinical. A gray with brown or taupe undertones reads as warm and sophisticated. The warm version is very much in play for 2026 exteriors. The cool version is what homeowners and communities are actively moving away from.
Should You Paint All Buildings in a Community the Same Color?
You should paint all buildings in a community the same body and trim colors to create visual unity, but you can introduce variety through different accent colors on individual unit doors or building entries. This approach gives the community a cohesive, well-managed identity while allowing enough variation that the buildings do not look identical. A palette of 3 to 5 approved accent colors provides the right balance of unity and individuality.
How Do You Make a Small Building Look Bigger With Paint?
You make a small building look bigger with paint by using a light body color, keeping the trim color close to the body tone for minimal contrast, and avoiding dark colors on large surfaces that absorb light and make the structure recede. Warm whites and soft creams reflect the most light and create the perception of expanded space. Light sage green and pale taupe also work on smaller buildings because they are light enough to reflect ambient light without the stark brightness of pure white.
What Colors Do Not Go Well With Gray?
Colors that do not go well with gray are warm oranges, warm yellows, and warm reds with strong orange undertones, because the temperature clash between the cool gray base and the warm accent creates visual tension. Cool grays pair best with cool accent colors: navy, teal, cool red, or black. Warm grays (greige) pair well with both warm and cool accents because the brown undertone bridges the temperature gap. This is another reason warm greige is overtaking cool gray as the preferred neutral: it works with a wider range of accent colors. Our door appointment process includes evaluating how proposed accent colors interact with the selected body and trim tones under actual lighting conditions on the building.
Putting It All Together
Exterior house painting ideas work best when they are grounded in current color trends, tested on actual building surfaces, and organized into a three-color scheme that creates visual unity across the community. The 2026 palette rewards warmth: greige, sage green, warm white, taupe, and deep charcoal are the dominant families, and every one of them pairs naturally with the Pacific Northwest's green landscape and variable light conditions. The communities that get the most satisfaction from their repaint projects are the ones that invest time in the color selection process before the crew arrives, because living with the right color for a decade feels very different from living with the wrong one.
At Verhaalen Painting, we help condominium and townhome communities select, test, and apply color palettes that residents genuinely love. Call us at (503) 657-5570 to start the conversation about your community's next exterior painting project.


Best Exterior Paint for Wood and How to Pick the Right Product?
The best exterior paint for wood is 100% acrylic latex paint, which delivers 7 to 10 years of protection on properly prepared surfaces by resisting cracking, fading, and moisture penetration better than any other formulation on the market. Acrylic latex earns the top recommendation because its resin stays flexible through seasonal temperature swings, which is critical for wood that naturally expands and contracts with heat and moisture. Oil-based paint still has a place on trim and doors, but for siding, railings, fascia, and decking, acrylic latex outperforms it in durability, ease of application, and environmental safety. This guide explains which paint types work best on exterior wood, how long each one lasts, how to choose the right finish, why primer matters more on wood than on any other substrate, and how to prepare wood surfaces so the paint job holds up for years.
What Type of Paint Is Best for Exterior Wood?
The best type of paint for exterior wood is 100% acrylic latex because it combines superior UV resistance, moisture protection, and long-term flexibility in a water-based formula that cleans up with soap and water. Three main paint types compete for exterior wood applications: acrylic latex, standard latex, and oil-based (alkyd). Each has different strengths, and the right choice depends on the specific wood surface, its condition, and the level of durability required.
Acrylic latex paint uses acrylic resin as its primary binder. Acrylic resin produces a paint film that stretches and contracts without cracking as wood moves through seasonal temperature and humidity cycles. This flexibility is the single most important property for exterior wood paint, because wood is a living material that never stops moving. A rigid paint film will crack at the grain lines within a few seasons; a flexible film moves with the wood and stays intact. Data from Trio Painting's analysis of exterior paint durability confirms that premium 100% acrylic paints deliver 8 to 12 or more years of protection with less than 5% color shift over a decade.
Standard latex paint also uses water as its solvent, but it relies on vinyl-acrylic or polyvinyl acetate (PVA) binders instead of pure acrylic resin. These binders cost less to manufacture, which makes standard latex more affordable. The trade-off is reduced flexibility and shorter UV resistance compared to 100% acrylic formulations. Standard latex performs adequately on exterior painting projects where cost is a primary concern and the wood substrate is in good condition, but it typically needs recoating sooner.
Oil-based (alkyd) paint creates a hard, dense finish that resists moisture and produces an exceptionally smooth surface. Oil-based formulations excel on doors, window casings, and decorative trim where surface hardness and a glass-like sheen matter. The limitation is brittleness: oil-based paint dries to a rigid film that becomes increasingly inflexible over time, making it prone to cracking on wood siding that expands and contracts seasonally. Several U.S. jurisdictions, including parts of California, have also restricted or banned oil-based exterior paints because of their high volatile organic compound (VOC) emissions.
Property
100% Acrylic Latex
Standard Latex
Oil-Based (Alkyd)
Flexibility on Wood
Excellent
Good
Low (becomes brittle)
UV Resistance
Excellent
Moderate
Moderate
Typical Lifespan on Wood
7 - 10+ years
5 - 7 years
5 - 7 years
Dry Time
1 - 3 hours
1 - 3 hours
6 - 8 hours
Cleanup
Soap and water
Soap and water
Mineral spirits
Best Use on Wood
Siding, trim, railings, fascia
Siding (budget projects)
Doors, window casings, trim
VOC Level
Low
Low
High
Sources: Trio Painting durability analysis, Dry Creek Custom Painting, Lowe's Exterior Paint Buying Guide, Vander Kolk Painting
What Is the Difference Between Acrylic and Latex Exterior Paint?
The difference between acrylic and latex exterior paint is the type of resin binder used in the formulation: acrylic paint uses 100% acrylic resin, while standard latex uses a blend of vinyl-acrylic or PVA resin that is less durable and less flexible. Both are water-based and clean up with soap and water. The distinction matters because the binder determines how well the dried paint film resists UV degradation, temperature cycling, and moisture penetration over time.
On exterior wood, 100% acrylic resin maintains its flexibility throughout its lifespan, adapting to seasonal wood movement without cracking or losing adhesion. Standard latex offers moderate flexibility that handles normal siding movement well but may not perform as reliably in climates with significant temperature swings. For condominium and townhome communities where repaint cycles need to be as long as possible to manage maintenance budgets, the premium for 100% acrylic pays for itself in extended service life.
Is Oil-Based or Water-Based Paint Better for Exterior Wood?
Water-based acrylic latex paint is better for most exterior wood surfaces because it stays flexible, resists UV fading, and dries quickly, while oil-based paint is better for high-contact surfaces like doors and trim that benefit from a harder, smoother finish. The modern paint industry has shifted decisively toward water-based formulations for full exterior applications. Premium acrylic latex now matches or exceeds oil-based durability on wood siding while offering faster recoat times, lower VOC emissions, and easier cleanup.
Oil-based paint still holds value for specific exterior wood applications. Bare hardwood trim, entry doors, and window casings benefit from oil-based paint's superior penetration into the wood grain and its dense, hard-cured surface that resists scuffing and impact. On our completed condominium projects, we evaluate each wood surface individually to determine whether acrylic or oil-based application will deliver the longest service life for that particular element.
How Long Does Exterior Paint Last on Wood?
Exterior paint lasts 3 to 7 years on wood siding under average conditions, with premium 100% acrylic formulations extending that range to 7 to 10 years or more when applied over properly prepared surfaces. The wide range reflects the enormous variation in wood species, paint quality, surface preparation, and climate exposure across different projects. Angi's contractor survey data places wood siding repaint frequency at every 3 to 7 years, while Trio Painting's analysis of premium acrylic products documents 8 to 12 years of service life in controlled conditions.
Wood species affects paint lifespan significantly. Hardwoods like oak and mahogany hold paint longer than softwoods like pine and spruce because the denser grain structure provides a more stable substrate for the paint film to bond to. Cedar and redwood present a unique challenge: both species contain natural tannins that bleed through paint and discolor the finish unless a stain-blocking primer is applied first. Here in the Pacific Northwest, where cedar siding is common on condominiums and townhomes, tannin bleed-through is one of the most frequent paint failures we encounter on projects where the previous painter skipped the primer step.
What Is the Longest Lasting Exterior Paint?
The longest lasting exterior paint is a premium 100% acrylic latex formulation applied over a quality primer, which delivers 8 to 12 or more years of protection on wood surfaces under favorable conditions. A real-world three-year durability experiment conducted by Paint Pals, a professional painting company in Colorado, tested eight different exterior paints from major manufacturers including Sherwin-Williams, Benjamin Moore, PPG, and Behr. The experiment exposed painted siding boards and 2x4 pine samples to full sun on horizontal surfaces, which accelerates weathering far beyond what vertical siding experiences.
PPG Permanizer emerged as the clear winner, demonstrating the least color shift, the best sheen retention, and the strongest resistance to dirt accumulation and peeling over the three-year test period. The second-best performer was Behr Pro e600, a more affordable product that outperformed pricier options from the same manufacturer. These results reinforce a key principle: the quality of the resin formulation matters more than the brand name or the price tag. Higher-grade paints use more concentrated acrylic resin and better pigments, which translates directly to longer service life on wood.
How Do I Choose the Right Exterior Paint?
Choosing the right exterior paint requires evaluating four factors in order: the wood surface type, the local climate, the desired finish sheen, and the quality tier that fits the project budget. Skipping any of these steps leads to a product mismatch that shortens the paint's lifespan or produces a finish that does not meet expectations.
Start with the surface. Wood siding, fascia, and soffits need a flexible acrylic latex that moves with seasonal wood expansion. Doors, window trim, and railings that take direct physical contact need a harder finish, either a premium semi-gloss acrylic or an oil-based enamel. Decking and horizontal wood features need a specialty deck coating or porch-and-floor enamel formulated to resist foot traffic, pooling water, and direct UV exposure.
Next, match the paint to the climate. Rainy climates like Oregon's demand paint with superior moisture resistance and mildew-inhibiting additives. Hot, sunny climates require strong UV stabilizers that prevent chalking and color fade. Freeze-thaw climates need maximum flexibility so the paint film survives repeated expansion and contraction cycles without cracking. Many premium exterior paints include all three protection types, but reading the product's technical data sheet confirms that the specific formulation addresses your region's primary threat.
Finally, select the quality tier. Budget exterior paints run $25 to $35 per gallon, mid-range products run $40 to $60, and premium 100% acrylic formulations run $55 to $90 or more. Higher-grade exterior paints typically last 10 to 15 years on properly prepared surfaces, while cheaper alternatives may need recoating in 3 to 5 years, according to industry analysis from Outdoor Paint. The cost-per-year calculation almost always favors the premium tier for professional painting projects on multi-unit communities where labor is the dominant expense.
Should Exterior Paint Be Eggshell or Satin?
Exterior paint should be satin for most wood surfaces because satin provides a soft sheen that resists dirt, cleans easily, and hides minor surface imperfections better than higher-gloss options. Satin finish, sometimes called low-luster, is the most widely used exterior paint sheen on wood siding and trim. Eggshell offers a slightly lower sheen that works well on smooth exterior walls but provides less stain resistance than satin, making it less ideal for wood surfaces that face rain, dust, and pollen exposure.
For doors, window casings, and wrought iron railings, semi-gloss or gloss finishes deliver higher stain resistance and a crisper visual contrast against the siding body color. Flat or matte finishes work well on rough or imperfect surfaces because the absence of sheen hides texture variations, but flat finishes collect dirt more readily and are harder to clean than satin or semi-gloss.
What Sheen Do Professional Painters Use?
Professional painters use satin finish for exterior siding body color and semi-gloss for trim, doors, fascia, and accent elements. This combination produces a clean visual hierarchy: the lower sheen on the siding recedes slightly, while the higher sheen on the trim elements catches light and creates definition. The approach is standard practice across the industry because it balances aesthetics with durability. Semi-gloss on trim resists the scuffing, moisture, and direct handling that trim surfaces experience, while satin on siding provides easier maintenance and better dirt resistance than flat finishes.
What Is the Most Common Exterior Paint Finish?
The most common exterior paint finish is satin, which accounts for the majority of residential exterior painting projects because it offers a practical balance of appearance, durability, and cleanability. Satin reflects enough light to give wood surfaces a subtle warmth without the high reflectivity that shows every surface imperfection. For condominium and townhome communities where visual consistency across multiple buildings matters, satin provides a uniform appearance that looks professional from the street while hiding the minor irregularities that naturally occur across large expanses of wood siding. Our satisfied clients consistently confirm that satin delivers the clean, well-maintained appearance their boards and residents expect.
Does Exterior Wood Need Primer Before Painting?
Yes, exterior wood needs primer before painting because primer seals the porous grain, blocks tannin bleed-through from species like cedar and redwood, and creates the adhesion layer that allows the topcoat to bond properly to the wood surface. Skipping primer on bare or weathered wood is the single most common cause of premature paint failure on exterior wood projects.
Wood is a porous, fibrous material. Without primer, topcoat paint soaks unevenly into the grain, producing a blotchy appearance and a thin, poorly bonded film that peels within one to three seasons. Primer fills the grain pores, creating a uniform surface for the topcoat to grip. On cedar and redwood, tannin-blocking primer prevents the natural wood acids from bleeding through the finish and staining the paint with brown or yellow discoloration. Stain-blocking primers use specialized resins that form a chemical barrier between the wood's tannins and the topcoat pigment.
Oil-based primers penetrate deeper into wood fibers and provide stronger stain-blocking on problematic species like cedar, but they take longer to dry (6 to 8 hours) and require mineral spirits for cleanup. Water-based acrylic primers dry in 1 to 2 hours, offer better flexibility on wood that moves seasonally, and clean up with water. For most exterior wood projects, a high-quality acrylic primer provides the best combination of adhesion, flexibility, and convenience. Using primer and topcoat from the same manufacturer creates a paint system engineered to work together, which maximizes adhesion and longevity. We walk every property manager and HOA board through primer selection as part of our project planning process.
Can You Paint Eggshell Straight Onto Wood?
You can paint eggshell straight onto wood only if the wood has been previously primed or painted and the existing surface is clean, dry, and in good condition. Bare or weathered wood always requires primer first, regardless of the topcoat sheen. Applying eggshell, satin, or any other finish directly over unprimed bare wood produces poor adhesion and rapid failure because the paint soaks into the grain instead of forming a uniform film on the surface.
How Do You Prepare Exterior Wood for Painting?
Preparing exterior wood for painting follows a specific sequence: clean, scrape, sand, repair, dry, prime, then paint. Each step builds on the previous one, and skipping any step compromises the final result. Surface preparation accounts for up to 60% of total labor time on a quality exterior paint job, according to industry data from RW Professional Painting. Professional painters spend approximately 70% of their scheduled project time on preparation and only 30% applying the finish coats.
Clean the surface. Power wash the entire exterior to remove dirt, mildew, chalking paint residue, and loose debris. Allow 24 to 48 hours of drying time before proceeding.
Scrape loose paint. Remove all peeling, cracking, or blistered paint down to a sound edge using a paint scraper or heat gun. Leaving loose paint under the new coat guarantees adhesion failure.
Sand rough areas. Sand scraped edges smooth and scuff-sand any glossy existing paint to create a surface profile the new primer can grip. Use 80 to 120 grit sandpaper for most exterior wood.
Repair damaged wood. Fill cracks, nail holes, and minor rot with exterior-grade wood filler or epoxy consolidant. Replace any boards with structural rot that cannot be repaired. Caulk gaps around windows, doors, and trim joints with paintable exterior caulk.
Verify moisture content. Use a moisture meter to confirm the wood reads below 15% moisture before priming. Painting over wood with higher moisture content causes blistering and adhesion failure. The U.S. Forest Products Laboratory research confirms that UV damage to bare wood lignin begins within as little as one week of sun exposure, so prime bare wood as soon as the surface is dry.
Apply primer. Brush primer into the wood grain on all bare and repaired areas. Back-brushing (brushing over sprayed or rolled primer to work it into the grain) improves penetration and adhesion on wood substrates.
Apply two coats of topcoat paint. Allow the first coat to dry fully per the manufacturer's specifications before applying the second. Two coats build adequate film thickness for long-term weather protection and true color depth.
What Moisture Content Should Wood Be Before Painting?
Wood should have a moisture content below 15% before painting, as confirmed by technical bulletins from Sherwin-Williams and Dunn-Edwards. Moisture trapped beneath a paint film cannot evaporate through the coating. Instead, it pushes against the paint from inside the wood, causing blisters, bubbles, and eventually peeling. A simple pin-type moisture meter, available at any hardware store for $20 to $40, provides an instant reading. Check multiple areas of the wood surface, paying special attention to end grains, butt joints, and areas near downspouts or sprinklers where moisture accumulates.
In the Pacific Northwest, where rain is frequent and humidity levels stay elevated through much of the year, monitoring wood moisture is especially important. We schedule exterior painting projects during dry weather windows and verify moisture readings before priming to protect every coat we apply.
What Causes Exterior Paint to Peel on Wood?
Exterior paint peels on wood because of moisture behind the paint film, inadequate surface preparation, incompatible paint products, or insufficient film thickness from applying only one coat. Understanding these failure modes helps property managers and HOA boards evaluate bids, ask the right questions, and hold contractors accountable for preparation standards that prevent premature failure.
Moisture intrusion is the most common cause. Water enters the wood through unpainted back sides, failed caulk joints, leaking gutters, or high ambient humidity. The moisture migrates to the painted face and pushes the paint film off the surface.
Skipped or inadequate primer allows the topcoat to sit on a weak foundation. Without the adhesion layer primer provides, the topcoat bonds poorly and lifts away from the wood grain within one to three seasons.
Painting over wet or dirty wood traps contaminants beneath the paint film. Dirt, mildew, and chalking residue from old paint all prevent proper adhesion. Wood above 15% moisture content is too wet to accept paint.
Applying a single coat leaves a thin film that lacks the thickness needed to resist UV degradation and moisture penetration. Two coats are the minimum for a durable exterior wood finish.
Tannin bleed-through from cedar or redwood weakens the paint film's bond and produces visible brown or yellow staining. A stain-blocking primer prevents tannin migration.
Incompatible paint layers occur when latex topcoat is applied over glossy old oil-based paint without proper scuff-sanding and priming. The new paint cannot grip the slick surface and peels in sheets.
What Are Common Exterior Painting Mistakes?
The most common exterior painting mistakes are skipping primer on bare wood, painting in temperatures below 50 or above 85 degrees Fahrenheit, applying only one topcoat, ignoring wood moisture content, and choosing a paint quality tier that does not match the project's durability needs. Each of these mistakes shortens the paint job's lifespan, sometimes by half or more. A contractor who skips primer saves a few hours of labor but costs the community thousands in early repainting. A single topcoat saves one day of work but produces a finish that fades and chalks years sooner than a two-coat system.
Can You Paint Pressure-Treated Wood?
Yes, you can paint pressure-treated wood, but only after the wood has dried to a moisture content below 15%, which typically takes 2 to 6 months after installation depending on climate and the treatment process used. Pressure-treated lumber arrives from the mill saturated with chemical preservatives dissolved in water. Painting over this saturated wood traps the moisture and chemicals beneath the paint film, causing rapid blistering and peeling.
To test readiness, splash a small amount of water on the wood surface. If the water beads up, the wood is still repelling moisture and is not ready for paint. If the water absorbs into the grain and the surface darkens, the wood has dried enough to accept primer and paint. A moisture meter reading below 15% confirms the surface is ready. Once dry, pressure-treated wood accepts acrylic latex primer and paint the same way untreated wood does. The key is patience: letting the wood dry fully before coating is the difference between a finish that lasts years and one that fails within months.
On condominium and townhome communities, pressure-treated wood is common on deck framing, stair stringers, railings, and structural posts. We include moisture verification in our project timeline for any newly installed pressure-treated components to make sure the coating adheres properly from day one. To learn more about how we plan and execute these projects, you can schedule a door appointment for a walkthrough of your community's specific wood surfaces.
Frequently Asked Questions
How Many Coats of Paint Does Exterior Wood Need?
Exterior wood needs a minimum of two coats of paint over a properly applied primer for a durable, long-lasting finish. The first topcoat seals the primed surface and establishes a uniform color base. The second topcoat builds the film thickness necessary for long-term UV protection, moisture resistance, and color retention. A three-year real-world experiment by Paint Pals confirmed that additional coats measurably reduced fading, particularly on darker colors exposed to direct sunlight.
When Should You Not Use Eggshell Paint?
You should not use eggshell paint on exterior wood surfaces that receive heavy moisture exposure, direct physical contact, or frequent cleaning, because eggshell's lower sheen provides less stain resistance and durability than satin or semi-gloss. Eggshell works well on smooth, protected surfaces like covered porch ceilings or sheltered accent walls, but siding, trim, doors, and railings perform better with satin or semi-gloss finishes that shed dirt and resist abrasion.
Does Darker Paint Fade Faster on Exterior Wood?
Yes, darker paint colors fade faster on exterior wood because they absorb more UV radiation than lighter colors, which accelerates the breakdown of pigment molecules in the dried paint film. Deep reds, blues, and blacks show visible fading sooner than whites, creams, and light grays under the same sun exposure. Premium paints with advanced UV-blocking additives slow this process significantly, but the physics of light absorption means darker colors will always require more frequent recoating than lighter ones on sun-exposed surfaces.
Can You Paint Over Old Exterior Paint on Wood?
Yes, you can paint over old exterior paint on wood as long as the existing paint is clean, dry, well-adhered, and lightly sanded to create a surface profile for the new coat to grip. Old paint that is peeling, blistering, or cracking must be scraped and sanded to a sound edge before recoating. If the old paint is oil-based and you plan to apply latex topcoat, scuff-sand the surface thoroughly and apply a bonding primer to bridge the two chemistries.
How Often Should Condominiums Repaint Exterior Wood?
Condominiums should repaint exterior wood every 5 to 8 years with premium acrylic latex paint, or every 3 to 5 years if budget-grade paint was used on the previous cycle. The repaint interval depends on the original paint quality, surface preparation standards, climate exposure, and how well the community maintains the finish between paint cycles. Regular washing of exterior surfaces, prompt caulk and touch-up repairs, and gutter maintenance all extend the interval between full repaints. Our portfolio of community projects demonstrates how thorough preparation and quality product selection produce finishes that hold up across multiple seasons.
Is Stain Better Than Paint for Exterior Wood?
Stain is not better or worse than paint for exterior wood; each product serves a different purpose. Paint creates an opaque film that hides the wood grain and provides maximum UV and moisture protection. Stain penetrates the wood and enhances the natural grain appearance, but it offers less UV and moisture protection than paint and requires more frequent reapplication, typically every 2 to 4 years for semi-transparent stains. For condominium siding where appearance consistency and long repaint intervals matter most, paint is the stronger choice. For decking and accent features where the natural wood character is desirable, stain delivers a more organic aesthetic.
Putting It All Together
Selecting the right exterior paint for wood is the first step toward a finish that protects the building, looks professional, and lasts long enough to justify the investment. The formula is straightforward: 100% acrylic latex for siding and most wood surfaces, oil-based for doors and trim where hardness matters, the right sheen for the application, a quality primer on every bare surface, and thorough preparation that gets the wood below 15% moisture before a single coat goes on. The preparation is the foundation; the paint is only as good as the surface beneath it.
At Verhaalen Painting, we have been selecting and applying the right products for condominium and townhome wood surfaces for over 30 years. Give us a call at (503) 657-5570 to discuss your community's next exterior painting project.

Redefine Success
It All Begins Here
Confidence doesn’t always arrive with a bold entrance. Sometimes, it builds quietly, step by step, as we show up for ourselves day after day. It grows when we choose to try, even when we’re unsure of the outcome. Every time you take action despite self-doubt, you reinforce the belief that you’re capable. Confidence isn’t about having all the answers — it’s about trusting that you can figure it out along the way.
The key to making things happen isn’t waiting for the perfect moment; it’s starting with what you have, where you are. Big goals can feel overwhelming when viewed all at once, but momentum builds through small, consistent action. Whether you’re working toward a personal milestone or a professional dream, progress comes from showing up — not perfectly, but persistently. Action creates clarity, and over time, those steps forward add up to something real.
You don’t need to be fearless to reach your goals, you just need to be willing. Willing to try, willing to learn, and willing to believe that you’re capable of more than you know. The road may not always be smooth, but growth rarely is. What matters most is that you keep going, keep learning, and keep believing in the version of yourself you’re becoming.

Small Steps Create Big Shifts
It All Begins Here
Confidence doesn’t always arrive with a bold entrance. Sometimes, it builds quietly, step by step, as we show up for ourselves day after day. It grows when we choose to try, even when we’re unsure of the outcome. Every time you take action despite self-doubt, you reinforce the belief that you’re capable. Confidence isn’t about having all the answers — it’s about trusting that you can figure it out along the way.
The key to making things happen isn’t waiting for the perfect moment; it’s starting with what you have, where you are. Big goals can feel overwhelming when viewed all at once, but momentum builds through small, consistent action. Whether you’re working toward a personal milestone or a professional dream, progress comes from showing up — not perfectly, but persistently. Action creates clarity, and over time, those steps forward add up to something real.
You don’t need to be fearless to reach your goals, you just need to be willing. Willing to try, willing to learn, and willing to believe that you’re capable of more than you know. The road may not always be smooth, but growth rarely is. What matters most is that you keep going, keep learning, and keep believing in the version of yourself you’re becoming.

Turn Intention Into Action
It All Begins Here
Confidence doesn’t always arrive with a bold entrance. Sometimes, it builds quietly, step by step, as we show up for ourselves day after day. It grows when we choose to try, even when we’re unsure of the outcome. Every time you take action despite self-doubt, you reinforce the belief that you’re capable. Confidence isn’t about having all the answers — it’s about trusting that you can figure it out along the way.
The key to making things happen isn’t waiting for the perfect moment; it’s starting with what you have, where you are. Big goals can feel overwhelming when viewed all at once, but momentum builds through small, consistent action. Whether you’re working toward a personal milestone or a professional dream, progress comes from showing up — not perfectly, but persistently. Action creates clarity, and over time, those steps forward add up to something real.
You don’t need to be fearless to reach your goals, you just need to be willing. Willing to try, willing to learn, and willing to believe that you’re capable of more than you know. The road may not always be smooth, but growth rarely is. What matters most is that you keep going, keep learning, and keep believing in the version of yourself you’re becoming.

Make Room for Growth
It All Begins Here
Confidence doesn’t always arrive with a bold entrance. Sometimes, it builds quietly, step by step, as we show up for ourselves day after day. It grows when we choose to try, even when we’re unsure of the outcome. Every time you take action despite self-doubt, you reinforce the belief that you’re capable. Confidence isn’t about having all the answers — it’s about trusting that you can figure it out along the way.
The key to making things happen isn’t waiting for the perfect moment; it’s starting with what you have, where you are. Big goals can feel overwhelming when viewed all at once, but momentum builds through small, consistent action. Whether you’re working toward a personal milestone or a professional dream, progress comes from showing up — not perfectly, but persistently. Action creates clarity, and over time, those steps forward add up to something real.
You don’t need to be fearless to reach your goals, you just need to be willing. Willing to try, willing to learn, and willing to believe that you’re capable of more than you know. The road may not always be smooth, but growth rarely is. What matters most is that you keep going, keep learning, and keep believing in the version of yourself you’re becoming.